A lot of you guys have been asking for how to remove Orange state warning after unlocking bootloader on MediaTek Android devices. I guess most Android users who have unlocked there bootloader finds it irritating seeing the orange state warning over and over on boot but no worries, in this guide we’ll be discussing how to hide the orange state warning on MediaTek Android devices In less than 5 minutes.
Before I proceed to the steps in hiding or removing Orange state warning from an unlocked MediaTek Android device, have you ever asked yourself what the Orange state warning means? Well, let me tell you.
The Orange state warning is basically a type of verified boot state in Android devices, it basically indicates that a device bootloader has been unlocked. Now, the next question that you want to ask is what is a verified boot state in Android?.
If you’re familiar with the UEFI secure boot on PC’s then you should understand what verified boot on Android is as well, they’re pretty much the same. For those who has no idea, Android verified boot is simply used to verify the integrity of an OS image.
‟Verified Boot strives to ensure all executed code comes from a trusted source (usually device OEMs), rather than from an attacker or corruption. It establishes a full chain of trust, starting from a hardware-protected root of trust to the bootloader, to the boot partition and other verified partitions including the system, vendor, and optionally OEM partitions. During device boot up, each stage verifies the integrity and authenticity of the next stage before handing over execution.” (source.android.com)
Like I mentioned earlier, Orange state warnings is a type of verified boot state which also means we have more types of verified boot states. We also have the Red State, Green state, and Yellow state Android verified boot.
You’ll get these verified boot states on Android devices as a result of bootloader unlocking or flashing non-signed factory file (using on a locked device). Below are all the Android verified boot state and its meaning.
Android verified boot states and meaning
- Red State: This means a device has failed verification, it often means a device is bricked and unable to boot.
- Green state: This means a device is verified and trusted, it is the default state in all Android and doesn’t display any warning on boot. It indicates a locked bootloader.
- Yellow state: This indicates that the Android boot partition has been verified using the embedded certificate, and the signature is valid.
- Orange state: This means device bootloader has been unlocked, in this state verification doesn’t take place and also indicates that a device can be modified freely.
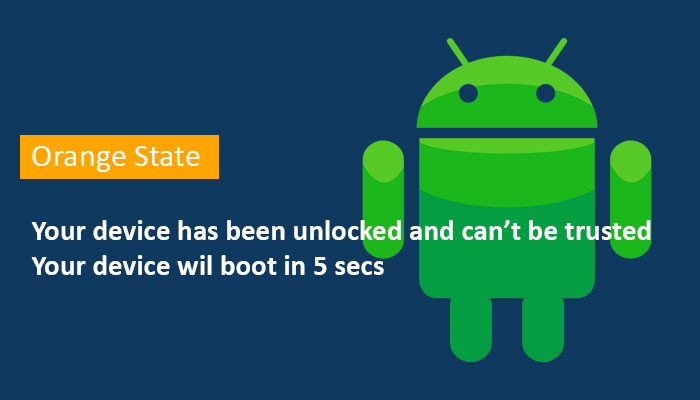
The Red and Orange state verified boot warning are the most commonly found on Android devices, they usually display as shown below.
Now that we’ve learnt what Android boot is about and the different states, lets dive into how to remove Orange state warning after unlocking bootloader on Mediatek Android devices.
Note: This method can be used to hide Android verified boot warning for other states as well.
How to remove Orange State Warning After Unlocking Bootloader on Any MediaTek Devices
Hiding the Red or Orange state warning on your unlocked device is very simple and can be done under 5 minutes. To do this you need the following;
- Your device LK.bin (or LK.img), you can get that from your device firmware. You can either download it or extract it yourself from a backup firmware. Use the video below to backup the firmware.
- Hex Editor (to edit your device LK.bin file). Download it here.
Steps to remove Orange State warning on MediaTek devices
I’ll assume you’ve gotten all the necessary files down at this point. Now, to hide/remove your device bootloader unlock warning;
1. Extract and install Hex Editor. Once installation is complete, launch it and minimize. We’ll be using it soon.
2. To make things a lot easy, create a new folder on your desktop and name it LK.bin/LK.img.
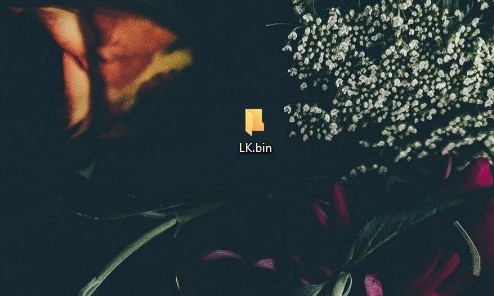
3. Now, copy the LK.bin file you got from your firmware backup or LK.img file from your stock firmware.
4. Launch Hex Editor.

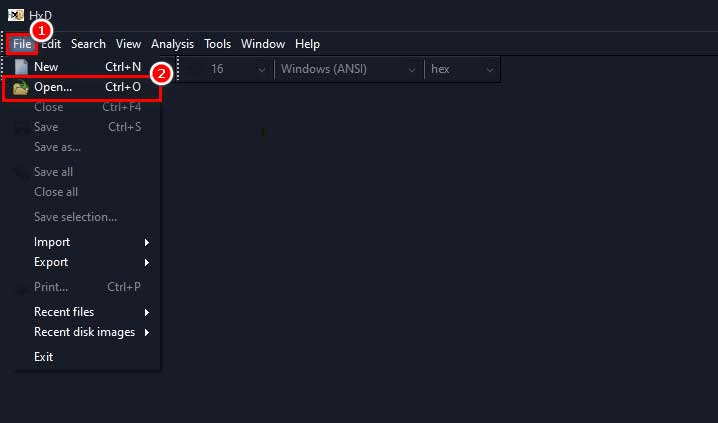
5. click on file and select open to pick the LK.img/LK.bin file
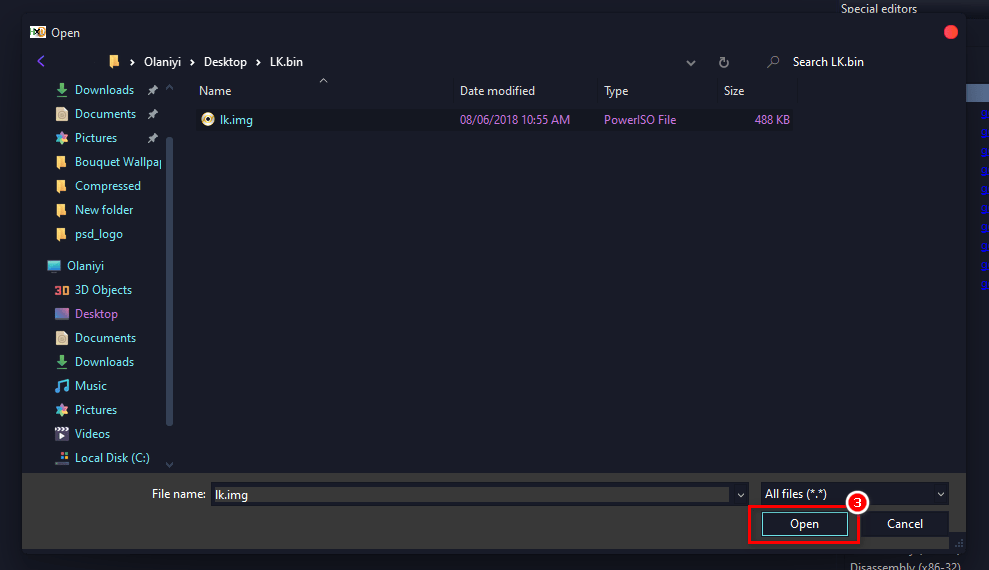
6. Once, the file explorer windows open, navigate to the LK.bin/img folder you created earlier, select it and click Open.
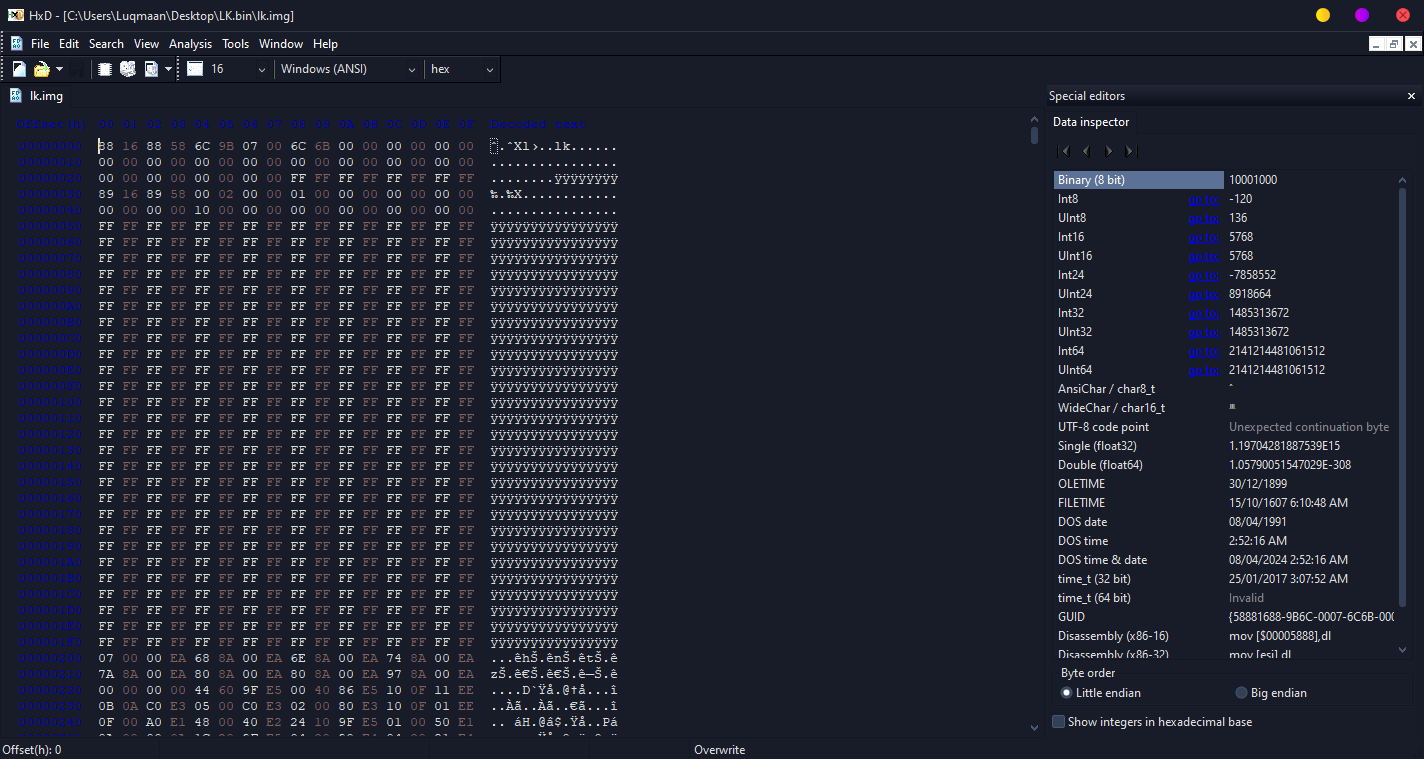
7. If there’s no error at this point, your LK.img/bin file will be loaded into Hex Editor and your main screen should now display some set of binary codes like the image below.
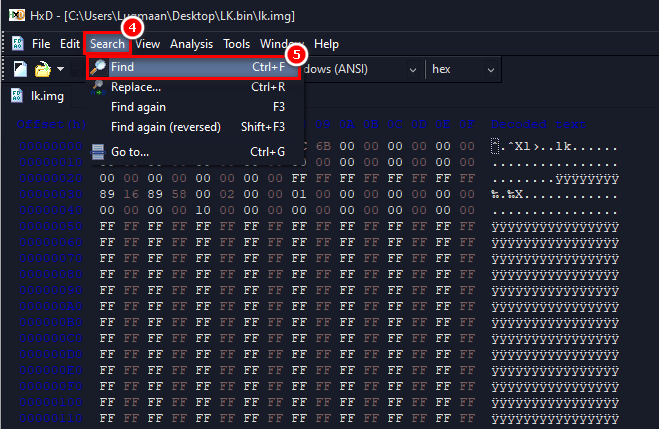
8. Now, to remove Orange state warning, Click on the search menu and select find from the drop-down.
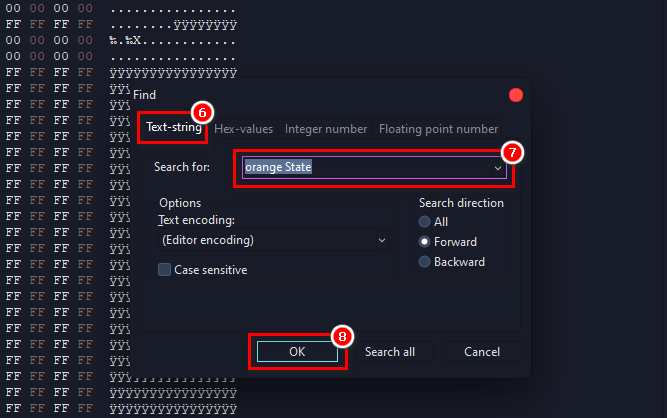
9. A new search Windows will open, here you have to choose the Text-string tab. In the search box, type Orange state / Red state depending on the boot state warning you want to get rid of and hit the OK button.
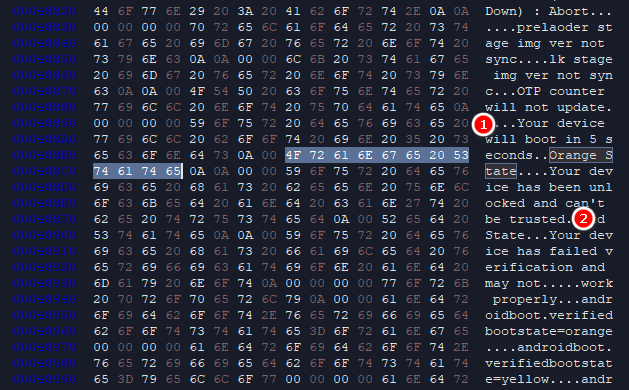
10. Once you tap the Ok button, you’ll be taken to the portion of the code where the Orange state / Red state begins. The area will be highlighted by default.
Take note of where the Orange state warning begins and ends. In my case, I have marked the starting point (1) and the end point (2).
11. Now, what you have to do is replace the characters of each pair of the highlighted area on the second column to 00. Doing this will translate each character on the third column to a dot (.). If done correctly the end result should look like the below.
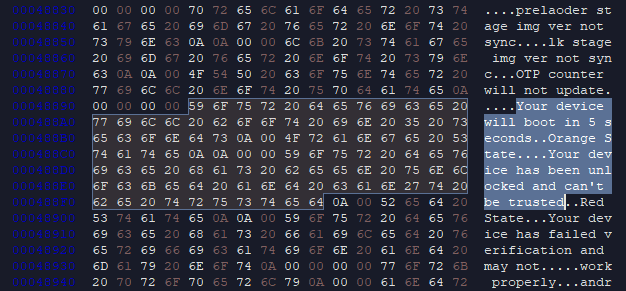
Before 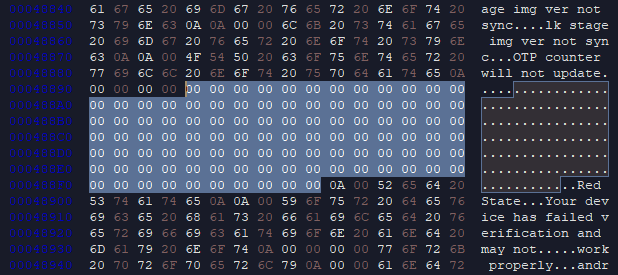
After
12. Now, you’re done removing the Red state or Orange state warning. The next thin to do is remove the 5 sec boot delay.
How to remove the 5 seconds boot delay time in Orange State
14. Still in your Hex Editor, click on search, select find from the drop-down and this time change the search parameters to Hex-values.
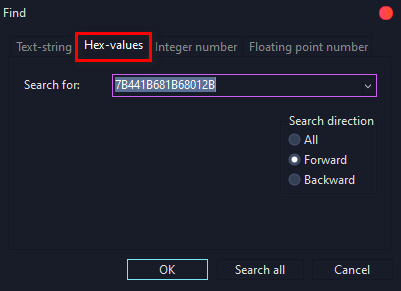
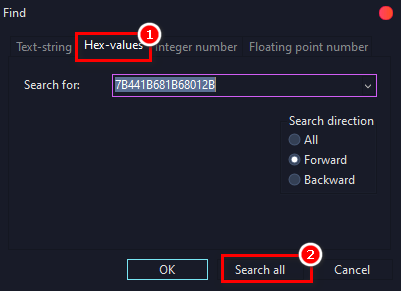
15. Now, search for this Hex values: 7B441B681B68012B. This values occurs more than one times, so to make the search easier, use the Search all button.
16. When the search result is displayed, look for the line where you have 08 B5 ** ** before 7B 44 1B 68 1B 68 01 2B in the results ( the asterisks means any random numbers but the first 4 values must be 08 B5).
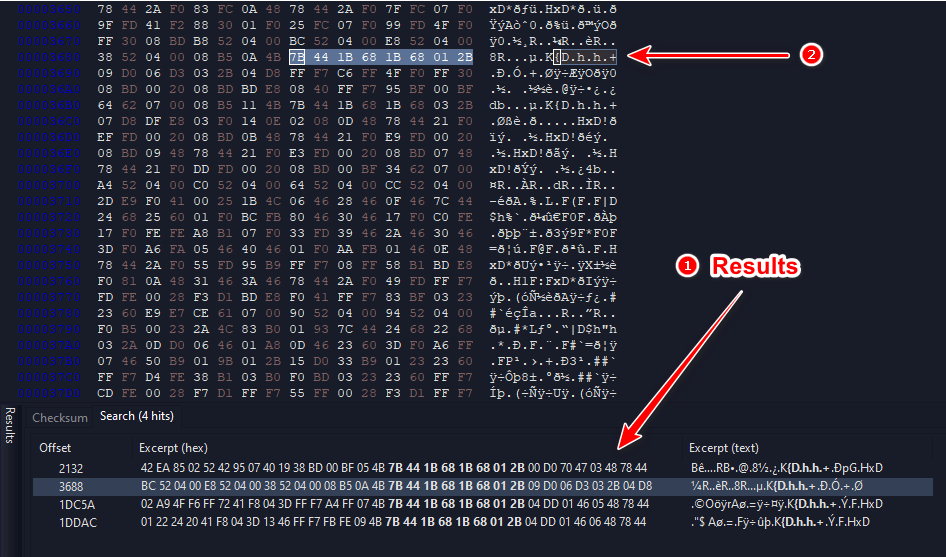
17. Once fond, double click on the particular line with the values in the result and it will highlight the location the Hex code as shown above.
19. Highlight the Hex code starting from where you have 08 and stop at 2D where the second column ends. The characters should be 24 in total.

20. Now, copy this new 24 characters 08B5002008BD1B681B68012B and replace with the one you just highlighted by right-clicking on top of it and select “Paste Insert“.
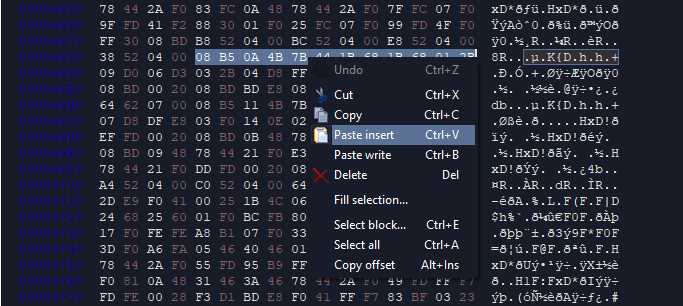
21. Once, you paste the new Hex values, it will be displayed in red colour, then click save from the file menu or simply by using CTRL + S.

22. Finally, go back to the LK.img/bin folder you created earlier, you’ll find two files, an LK.bin.bak/LK.img.bak and LK.bin/LK.img. The original file is now the one with the .bak file extension and the new file is the one retaining the original file extension (.bin/.img)
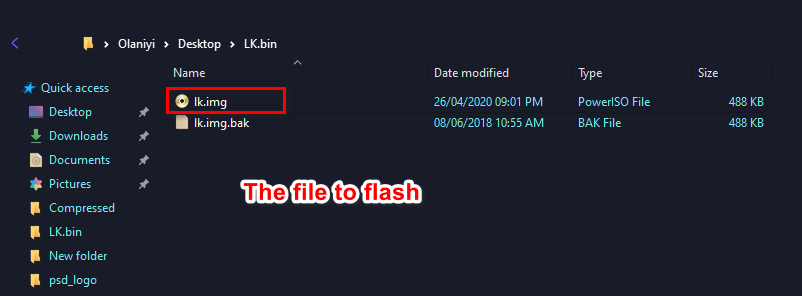
23. Copy the LK file and flash with either Sp flash tool or ADB. If you’re facing any issue booting, just flash the original LK file and it will be fixed.
That’s it on how to remove Orange state warning and 5 sec boot time delay after unlocking bootloader on MediatTek Android devices. If you encounter any error or challenges hiding bootloader unlock warning on your device, simply use the comment section below.

As usual you’ve outdone yourself. I’ve done the procedure and can’t believe it worked. The ‘orange state’ message is gone, and i did this in one go thanks to the precise instructions. Thanks so much for this ????
Glad you were able to remove orange state warning successfully.
Hello!
Do I need to disable the verified boot (dmverity) before flashing the modified lk.img? And there are two file lk and lk2, which one should i edit/modify or should I modify both? And will flashing the lk file wipe my data.
You don’t need to disable verified boot before flashing. Secondly, only edit the first lk (LK.img)file. Lastly, flashing LK won’t wipe your device.
Thanks.. BTW I solved the problem.
thank you
you are the best
Thank you Sir.????
Hello! Thank you for instruction! But unfortunately it does not work on Nokia 1, because there is another protection sublevel in the boot.img file