Are you trying to port a TWRP recovery for your MediaTek Android device? Whether you have a single or A/B partitioned device, in this comprehensive guide, you’ll learn how to port TWRP for any Android device powered by the MediaTek Chipset.
The default Android recovery of any device is also popularly referred to as stock recovery. This recovery is provided by phone manufacturers and has limits to what it can do.
The Android recovery partition is one of the most important partitions in the Android system. This partition holds the Android recovery tool that helps in upgrading, updating and troubleshooting a device whenever it runs into a problem.
The Android stock recovery tool/recovery mode gives you a variety of troubleshooting options/features that will help you fix minor issues on a device. With the Android recovery, you can install OS updates through ADB or from your SD card, wipe data/factory reset your device, format/wipe cache partition, mount system partition, run graphics test and view recovery logs.
A custom recovery like TWRP, however, removes the limitation in stock Android recoveries and gives you a wide variety of advanced recovery mode features that allow you to do so much more in the Android recovery mode. You can install individual firmware components on their respective partitions in TWRP, mount partitions, take a complete backup of your firmware, restore firmware backup, resize and change file system format etc.
What is TWRP?
Team Win Recovery Project (TWRP) is an open-source software custom recovery image for Android-based devices. It offers a touchscreen-enabled interface that allows users to install third-party firmware (custom ROM or GSI ROM), mount partitions, backup and restore firmware, flash performance and sound mods etc.
TWRP recovery is the most popular and powerful root tool for your Android devices. It unlocks limitless customization possibilities for any Android device. It gives you super user privilege on your device and is easy to use. TWRP variants include:
- PBRP (PitchBlack Recovery Project)
- OFRP (OrangeFox Recovery Project)
- SHRP (SkyHawk Recovery Project).
TWRP Features:
- Install Zip (From SD Card, Internal Storage, OTG Storage)
- Advanced Wipe Menu (Dalvik, System, Cache, Data,
- Internal Storage, SD Card, USB Otg)
- Advanced (Backup | Restore) Menu
- Advanced Mount Options
- TWRP File Manager
- Advanced Reboot Option
- Completely Material Themes
- Easy And Simple
- Proper Detail Of Task
- Showing Progress In Percentage
- Automatically Flash More Than One Zip File One By One
- Fix automatic installation of OTA zips on encrypted devices
- Remove SuperSU from TWRP
- Support both md5 and md5sum file extensions when doing MD5 checking for zip files
- File Manager
- Brightness Control
- Full Touch control
Advantages Of TWRP Custom Recovery
- Ability to install custom ROMs/GSI Roms easily
- Improve device performance by flashing sound and performance mods
- Easily root your device
- Take full firmware backup (Nandroid backup)
- Resize partitions
- Repair or change the file system
- Wipe individual partitions
- Terminal etc.
Disadvantages Of TWRP Custom Recovery
- Your warranty is now void.
- Risk of bricking your device.
Without further ado, let’s dive into the step-by-step guide on how to port TWRP for Android devices with the MediaTek chip onboard.
Important Note: This guide on how to port TWRP for Android device (MediaTek) has only been tested on Android devices running Android 9 and 10. So, if you’re trying it on devices with Android 11 out of the box, you are trying at your own risk. I don’t have an Android 11 device to test with. However, if you test and succeed, kindly drop a comment. This site or its author will not be held responsible if you brick or damage your device when you port and flash a recovery using this guide. This guide may not work for some Android users. New guides will be added on this site, so, subscribe so that you don’t miss a single update.
How To Port TWRP For MediaTek Android Devices

For this tutorial, we will be making use of a popular Android image tool called the Android Image Kitchen to port TWRP custom recovery for a device. With this tool, you can easily unpack and repack your device boot and the recovery image (boot.img and recovery.img).
You can get your device stock boot.img or recovery.img from your device’s official firmware. However, if you can not find your device’s stock ROM online to download, you can back up your firmware following our previous guide on how to extract stock firmware from your device using the smartphone flash tool.
For MediaTek Android devices that only have a boot partition and no recovery partition, we will publish a different TWRP porting guide for you and how to install TWRP on the device.
Also, it is important that you know the type of CPU your device uses, whether it is a 32bit or 64bit CPU, this will help you to identify the base (port) recovery that you need to download to port for your device. If you’re not sure about your device’s CPU type, download and install the Device Info: System & CPU Info app from the Google Play Store to get your device information.
Once the app is installed, open it and navigate to the CPU tab, there you will find your device CPU information including the type of CPU your device uses. You can also use the app to get other information like display, camera, sensor, battery, memory, network and more about your device.
Prerequisites:
- Android Image Kitchen | Download Here
- Carliv Image Kitchen (Recommended for newer devices) | Download
- TWRP Port recovery image file | Download Here
- Stock recovery image file (32bit/64bit) | Get it from your device firmware
- DM_verity Disabler – empty vbmeta.img file | Download Here
We have added TWRP, PBRP, and OFRP on the TWRP port download page, so you can download any one and use it as a port recovery image (base recovery).
You can also check if your device has official custom recovery support on the TWRP variant websites below otherwise jump to the step-by-step guide below.
Steps To Port TWRP For MediaTek Android Devices (For Devices With Recovery.img)
- Download the Android Image Kitchen Tool zip file from the link above and extract the file into a folder.
- Download the port recovery with respect to your device’s CPU type.
- To make the process convenient, rename the Android Image Kitchen folder to AIK port or just port.
- Duplicate the folder and rename the duplicate AIK stock or stock, whichever you prefer. Note: you can give the folders any name of your choice, we’re only doing this so it is easy for us to jump back and forth between the two folders.
- Copy the port and stock recovery.img into their respective Android Image Kitchen (AIK) folder.
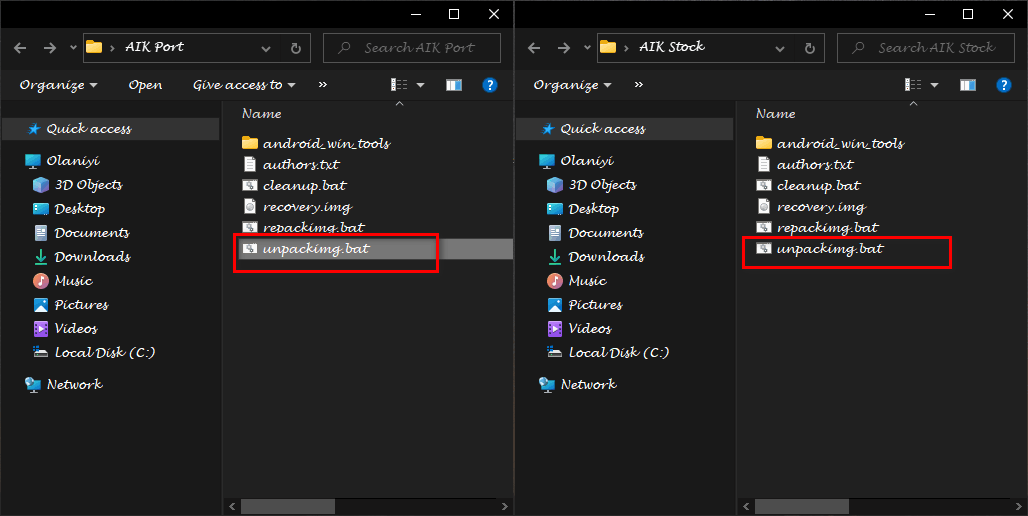
- Run the unpackimg.bat command file in both port and stock AIK folders to unpack the reocvery.img file to get its components. To run the unpackimg.bat file, double-click on it and you’ll see a new Windows popup displaying some ongoing operation, click enter to continue once it’s done.
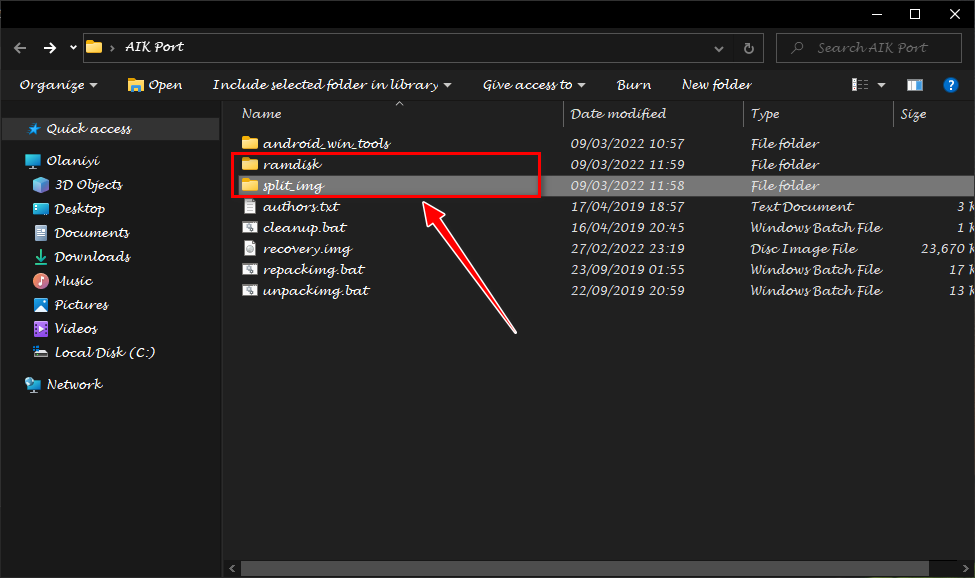
- You should two additional folder (ramdisk and split_img) in both port and stock AIK folders.
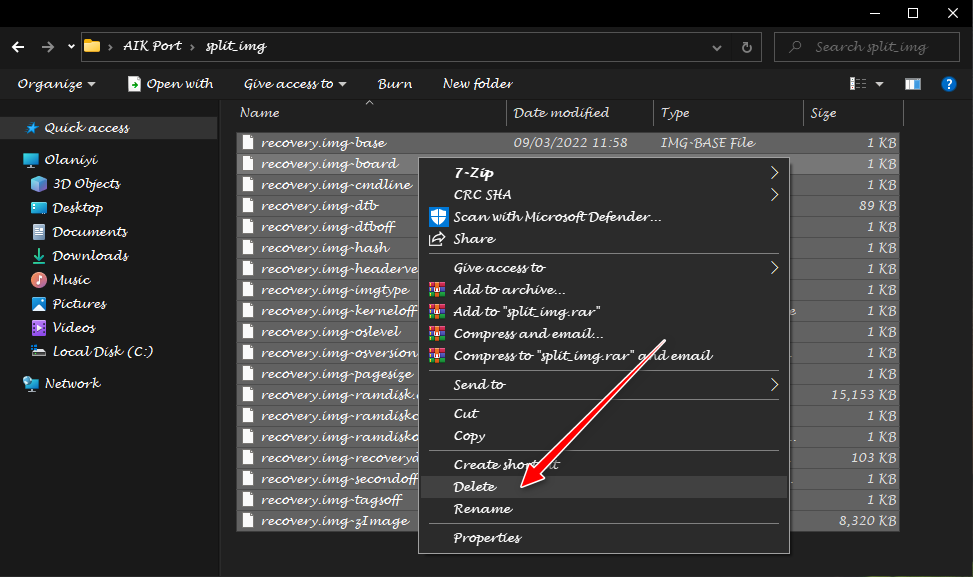
- Go into the port AIK folder, open the split_img folder and delete all the files inside.
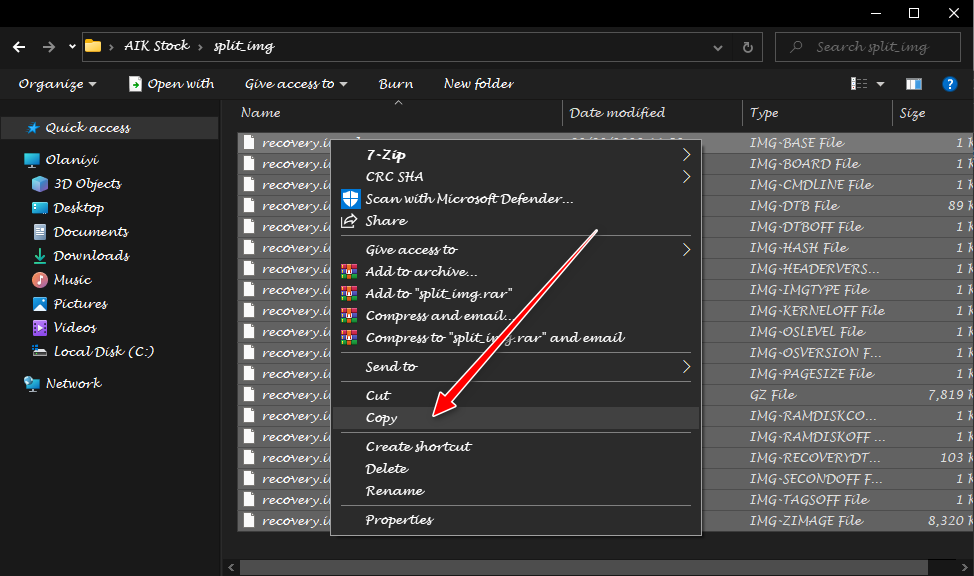
- Once you have deleted the split_img folder files from the port AIK folder, copy the split_img files in the stock AIK folders and paste them in the port AIK folder.
- Go back to the stock AIK folder and this time, open the ramdisk folder, in the ramdisk folder, you will find a default.prop file and a prop.default file. The default.prop file, we don’t need it, so, copy only the device prop.default file and replace it with the one in the port ramdisk folder.
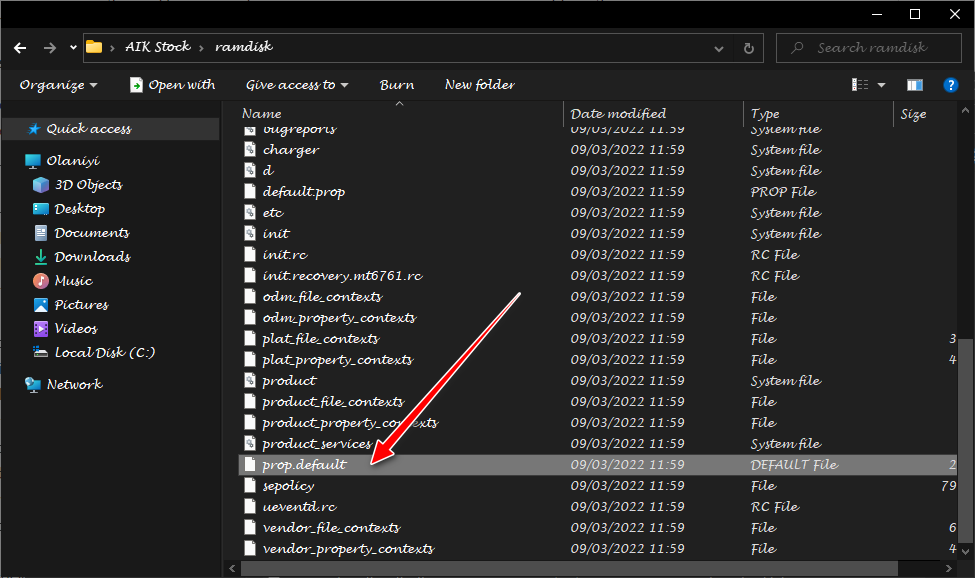
- Now, we need to repack the port recovery.img and test our newly ported TWRP custom recovery.
- Run the repackimg.bat command file and continue in the new window once the repack operation has been completed.
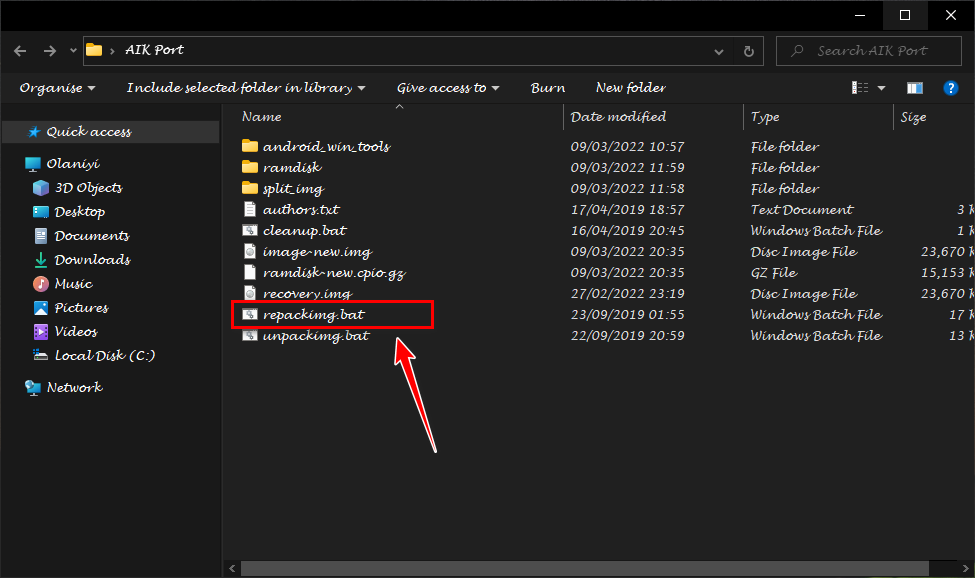
- You will now have a new image file named new-image.img.
- Copy the new-image.img to a separate folder and rename it to recovery.img.
- Now, flash the new recovery.img (TWRP) on your device either using adb or using a smartphone flash tool.
That’s it you have just successfully ported TWRP for your device. If you want to watch the step-by-step TWRP porting guide video, see the video below.
Steps To Port TWRP For MediaTek Android Devices (For Devices Without Recovery.img)
- After you have downloaded the Carliv image kitchen tool, port recovery, and firmware file, they will be in compressed format (archive). You need to extract the contents of each other from the file you downloaded.
- Open the CIK folder after extracting and you find the tool components. By default, the folder will contain two sub-folders (bin and script) with a carliv.bat executable script.
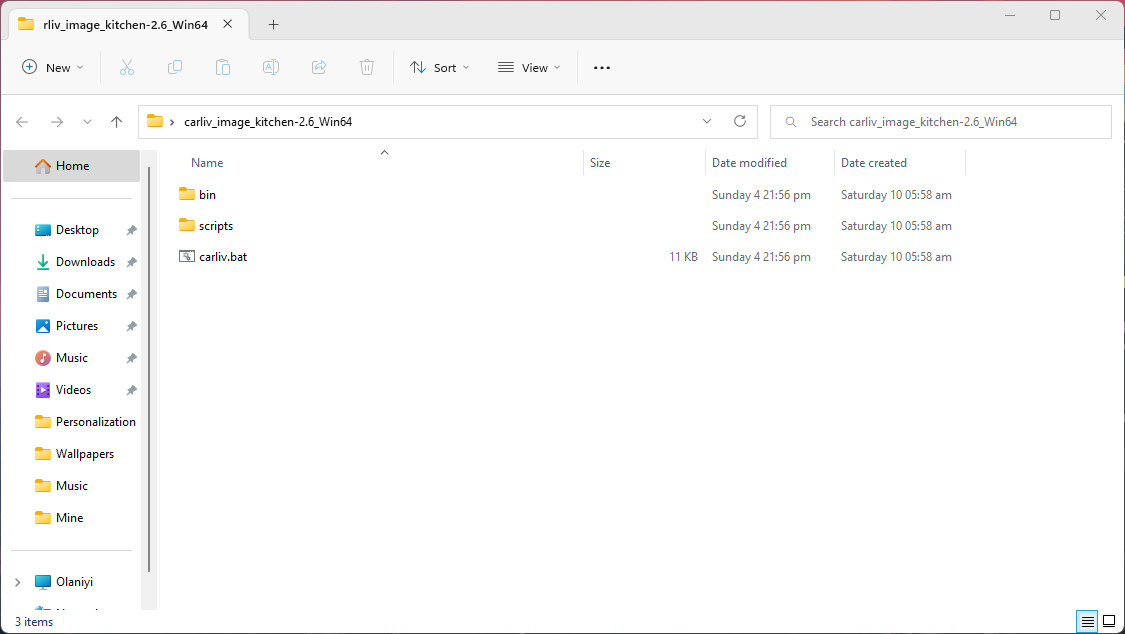
- Double-click on the carliv.bat file to run the CIK script. An interactive command window will pop up and a new folder named “input” will be created in the CIK folder.
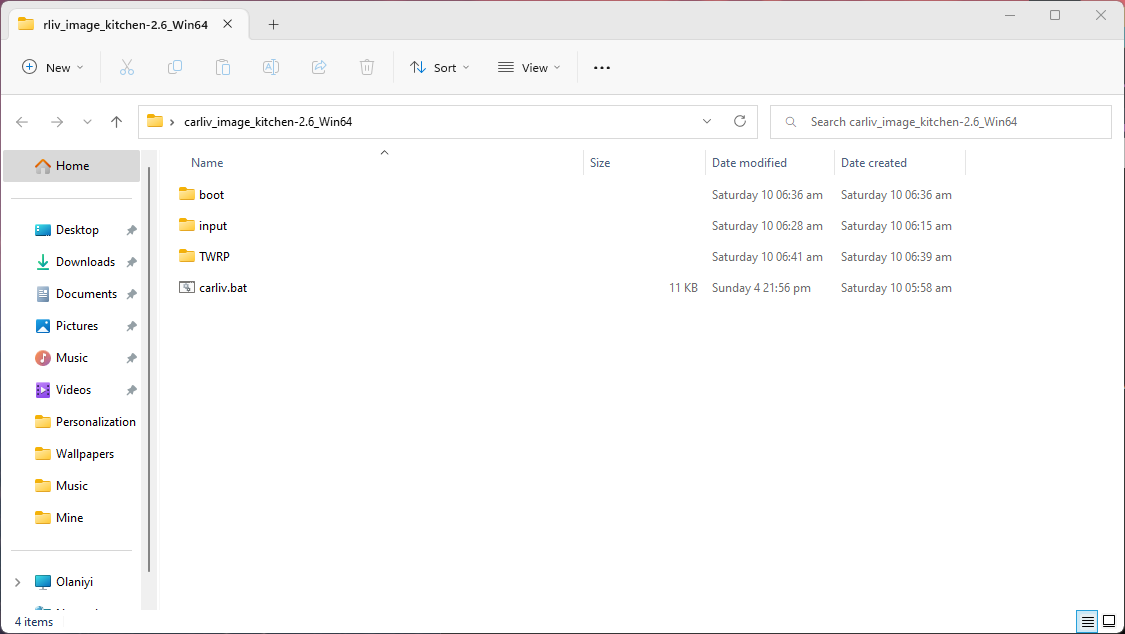
- Copy the port TWRP and your stock boot.img file into the input folder.
- Now, open the CIK command prompt window, type I, and hit enter to list the image files in the command window.
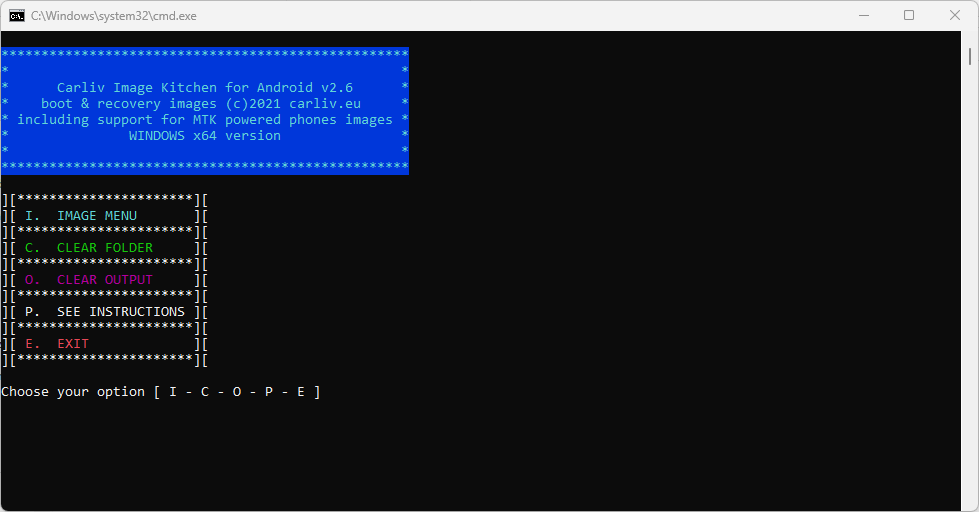
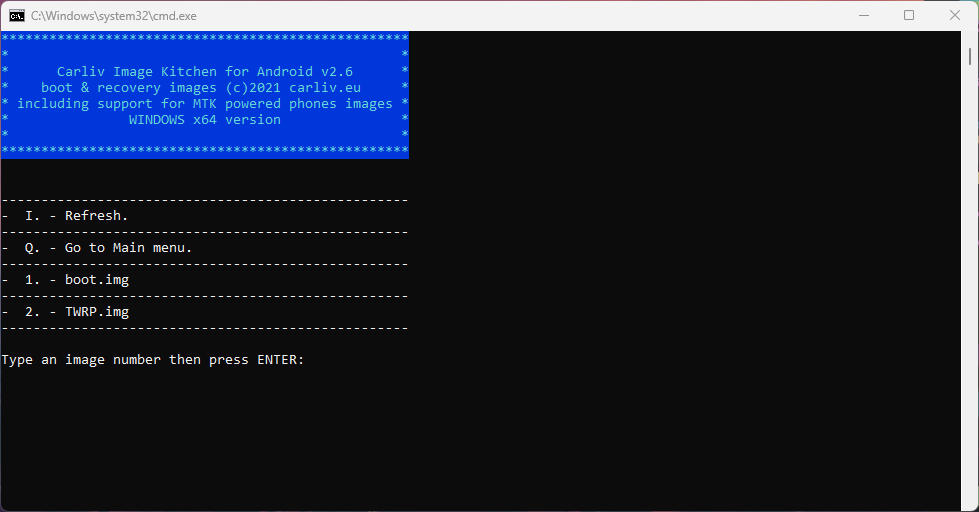
- We need to unpack the port TWRP and stock boot image file. Select an image file using the number assigned to it. In my case, I have boot.img as 1 and twrp.img as 2. It doesn’t matter which one you choose first. So, I’m going to type 1 and hit enter.
- On the next screen, you can now extract the image file following the on-screen instructions. To extract the selected image, type 1 and wait for the unpacking process to complete.
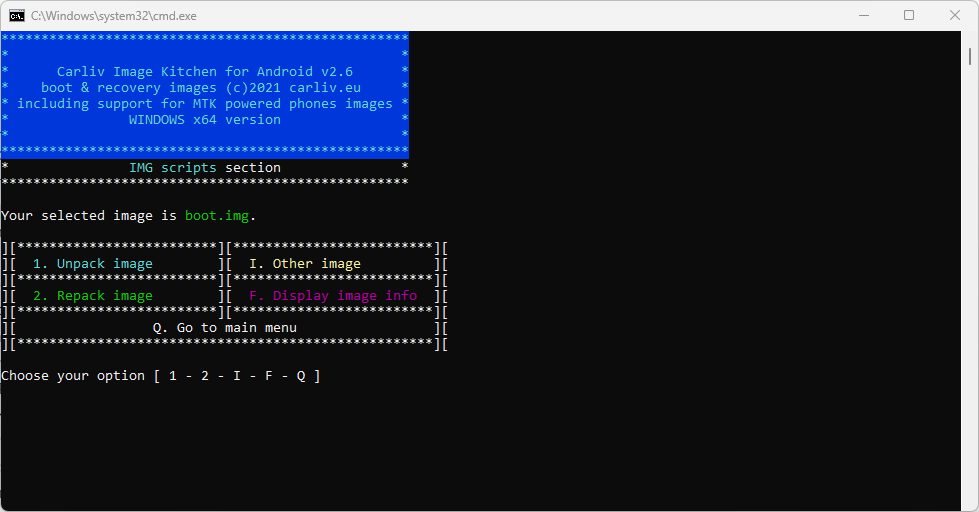
- After unpacking the first image file, type I again to return to the image list screen, select the second image and unpack it.
- Once you’re done unpacking the boot.img and twrp.img, minimize the command window, and return to the CIK folder. You should now have two additional subfolders named after the image files you unpacked (boot and TWRP folder).
- Open both folders (boot and TWRP) side by side, in the TWRP folder, delete all the files in it excluding the ramdisk folder. Copy all the files excluding the ramdisk folder in the boot folder and paste them into the TWRP folder.
- In the boot folder, open the ramdisk folder, scroll to the bottom and copy the prop.default file and replace it with the one in the TWRP ramdisk folder.
- Next, open the system folder in the boot folder, open the etc folder and copy ueventd.rc file and replace it with the one in the TWRP system → etc folder.
- Once, you’re done, you can close all folders. Open the CIK command Window again, go to the image list and select the TWRP image.
- Type 2 to repack the TWRP image file (folder) and wait for the process to finish.
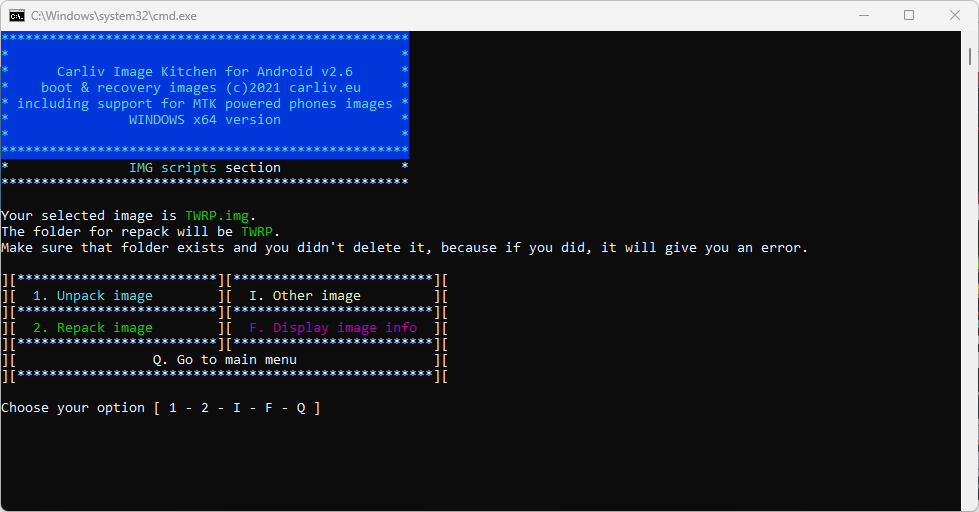
- In the CIK folder, you should now have an output folder containing the newly ported TWRP image file
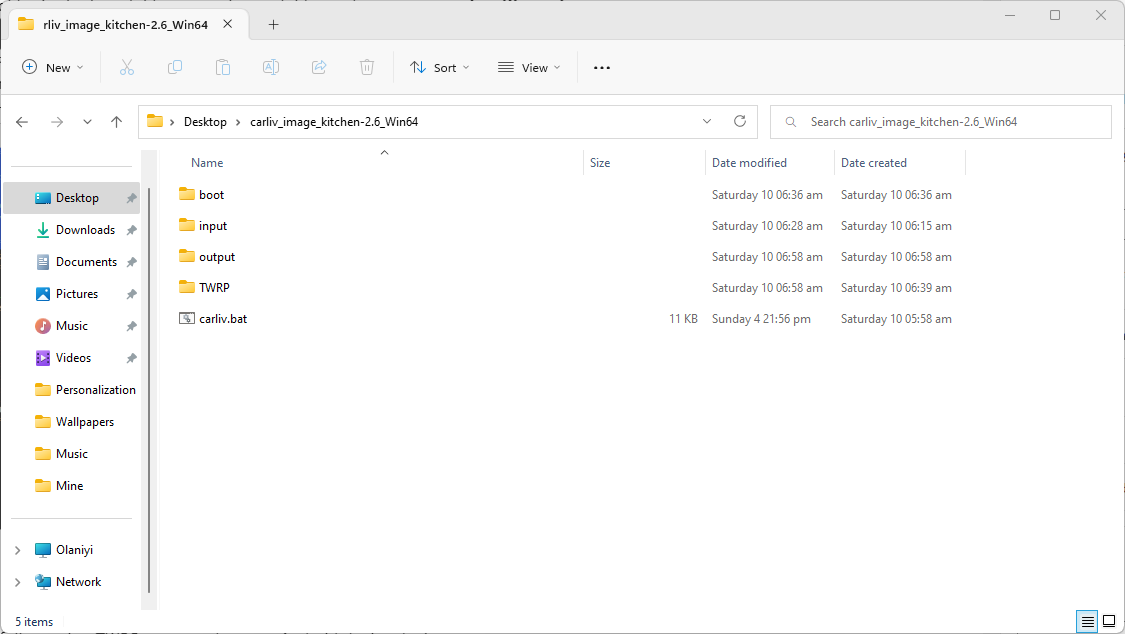 .
. - Copy the ported TWRP and flash it on your device.
That’s it, you’ve successfully ported TWRP recovery for your A/B partitioned Android device.
How To Flash TWRP On Your Android Device Using ADB
Using ADB to flash TWRP on your device requires that you have an unlocked bootloader and dm-verity disabled. DM_verity is a security mechanism placed by Google to prevent untrusted codes from executing on a device. If not disabled before flashing a custom .img file on your device, it may not boot. To unlock your device bootloader and disable the DM_verity check, follow the simple step-by-step guide below.
1. First off, install ADB and Fastboot drivers on your PC.
2. Enable developer options on your device, to do that go to the About phone on your device and scroll to find your device build number and once found tap on it continuously until you see you’re now a developer.
3. Now, go back to the settings app list and find the system option, tap on it and you’ll now see the developers option.
3. In the developer option, enable OEM unlocking and USB debugging.
4. Now download and install Minimal ADB and Fastboot tools on your PC.
5. Once, you’ve installed ADB and Fastboot tool on your PC, launch it and connect your device.
6. Now, enter the following commands below.
adb devices
You should get a prompt on your phone’s screen to grant access permission, and accept the permission.
7. Now, we’ll reboot into the device bootloader by using the below command.
adb reboot bootloader
8. Once your device reboots into the bootloader, you now have to unlock your bootloader using the command below.
fastboot oem unlock
If the above command fails, then try the second unlock command below.
fastboot flashing unlock
Step 9. Now, when the unlock process is done, reboot your device using the command.
fastboot reboot
Wait for your device to boot. On boot, you’ll notice a warning text that your device is now insecure blah blah blah. You don’t have to panic, your device is ok.
You’ve successfully unlocked your device bootloader. Now, you can proceed to install TWRP on your device.
Steps To Flash TWRP On Your Android Device Using ADB
- Copy the newly ported recovery.img (TWRP) and the empty vbmeta.img file you downloaded earlier into the ADB and Fastboot folder
- Right-click on a space in the ADB and Fastboot folder and select open Windows command prompt here from the context menu.
- Connect your device to the PC and enter the command
adb reboot bootloaderto reboot your device in bootloader mode. - Flash the empty vbmeta.img file using the command
fastboot – disable-verification flash vbmeta vbmeta.imgto disable Dm_verity. If the command gives an error, try the second commandfastboot flash --disable-verity --disable-verification vbmeta vbmeta.img. - In bootloader mode, enter the command
fastboot flash recovery recovery.imgto flash the newly ported TWRP recovery on your device. - If your device is A/B without a recovery partition, then the command you should use is
fastboot flash boot twrp.img - After a successful flash, boot your device into TWRP recovery mode using
fastboot reboot recoveryorfastboot rebootthen hold the volume-up key before your device displays the Android logo. Continue holding the volume up key until the TWRP recovery mode appears.
You have now successfully installed TWRP on your MediaTek Android device. To flash the newly ported TWRP using the smartphone flash tool, see our previous guide on how to flash MediaTek devices using the smartphone flash tool.
Troubleshooting Reboot and Bootloop Issues After Flashing The Newly Ported TWRP
If after flashing the newly ported TWRP recovery, you run into a bootloop or your device reboots automatically when trying to boot into the TWRP recovery mode, try the following fix.
- Go back to the stock AIK folder and open the ramdisk folder.
- In the ramdisk folder, scroll down to find ueventd.rc file.
- Copy the ueventd.rc file from the stock AIK ramdisk folder and replace it with the ueventd.rc file in the port AIK ramdisk folder.
- Repack the port recovery.img and flash the updated recovery.img file on your device.
You should now have a working TWRP on your device.
That’s it on how to port TWRP for MediaTek Android devices. If you find the guide helpful, please share. Also, if you run into any problems, check the FAQ section below and if you can’t find a fix, drop a comment, we’ll get back once we receive your feedback.
TWRP Port Recovery Image File
| Port Recovery | TWRP | PBRP | OFRP | SHRP |
|---|---|---|---|---|
| MT67** 32-bit | Download | Download | Download | Download |
| MT67** 64-bit | Download | Download | Download | Download |
| Dimensity 810 | Download | Download | Download | Download |
FAQ: How To Port TWRP For Android Devices
How To Port TWRP For Qualcomm Android Device
You can port TWRP for Qualcomm devices using TWRP Auto Porter by Hovatek. We will be publishing a guide on that soon
How To Port TWRP For Spreadtrum Android Devices
You can manually port TWRP for your Spreadtrum Android device using the Calvic Image Kitchen or Android Image Kitchen tool. You can also port TWRP for Spreadtrum devices automatically using TWRP auto porter.
Will My Device Brick After Flashing The Ported TWRP
The porting guide we have shared may not work for All MediaTek Android devices. Some users may run into bootloop after flashing the newly ported recovery but that can easily be fixed by flashing the device stock recovery.img back on the device.
Can I Flash TWRP Using the Smartphone Flash Tool
Yes, you can flash TWRP using any smartphone flashing tool. However, we recommend using the fastboot method.


Hello, wonderful, however, shouldn’t the final flash command with fastboot be:
“fastboot flash boot new-boot.img”
Instead of:
“fastboot flash recovery recovery.img”
As such devices do not have recovery partitions!
That is correct if you are porting TWRP for an A/B device without a recovery partition. This guide is meant for devices with a recovery partition. You can find TWRP porting guide for A/B devices that don’t have a recovery here.
The following link for ( TWRP Port recovery image file | Download Here) is not working…
https://techsbyte.com/download/twrp-custom-recovery/
I am confused about the base twrp image which i should use…. please suggest me for Heilo A22 MT6761, 800×1280 and Android 10 device…..
We have updated the links on this page.
Le lien de téléchargement de twrp de base ne fonctionne pas du tout c’est compliqué ! dans ce cas On pourrait pas en prendre un twrp d’un autre téléphone comme celui de base ?
Le lien a été mis à jour et oui, vous pouvez transférer à partir d’un appareil similaire si vous en trouvez un