In this post, we will show you the how to install GSIs (Generic System Images) on treble compatible devices step by step.
In other to make sure all Android devices receive new OS updates quicker regardless of their OEM, Google rolled out the project treble with the release of Android Oreo however, made it official when it rolled out Android Pie. Project Treble is Google’s new architectural rework for Android which separates the complete OS framework from the vendor implementations. Project treble allows Android users to install GSI (Generic System Image) giving them the opportunity to try newer OS versions on their devices where their device OEM fails to provide the new OS support.
Before we dive into the details on how to flash GSIs on Treble supported devices, let us take a quick look at what GSIs are and how they are different from custom ROMs.
What Are GSI Images?
GSIs (Generic System Images) are basically custom roms that can be installed on any project treble enabled device regardless of the OEM. Before GSI became a great deal in the Android community, we had custom roms and these were device-specific roms that cannot be flashed on any other device except the device it has been compiled for. For example, let’s say a developer compiled a custom rom from source for the Tecno Camon 18, this rom will only work for the Camon 18 and if flashed on any other model that is not the Camon 18 will result in a hard brick.
Read also: How To Extract Your Stock Firmware from Your Android Device
GSIs on the other hand can be installed on any Android device that comes with project treble support. Although GSIs can be installed on all project treble devices, the experience a custom rom user get maynbe a bit different. This is because custom-rom developers take their time to build roms for a particular device and provide maintenance to ensure that rom brings out the best of that device and also make it is bug-free. If bugs are detected after rolling out a rom built for a device, the rom-developer (s) takes their time to patch the rom by providing updates for the device. GSI, however, do not get that much treatment from developers because of the wide variety of devices from different OEMs that it supports.
Different users may encounter different issues after installing a GSI, some users after flashing will enjoy a smooth OS experience while the same GSI can cause another device to underperform. Some devices may not even end up boot looping after installing a GSI and several other issues will be discovered and reported but this would mean a lot of work for the developer (s) behind it. Also, because of the unstable nature of GSIs on some devices, a lot of fans are left with the option of trying out as many GSI images they can find online on their device to find out the one that runs best on it.
How To Install GSI ROMs On Project Treble Android Devices
For the sake of this tutorial, we will be taking a MediaTek device (Tecno Spark 4 KC8 Android 10) as a reference. Note – some devices have a different method of installing a GSI, however, the method we will be sharing here works on most MediaTek devices.
GSI ROMs are easy to install and there are two simple ways you can do that. The first method is to install using a custom recovery like TWRP, SHRP, PBRP or Orangefox Recovery. The second method is the adb and fastboot method for those who do not have a custom recovery for their device.
However, before you can install a GSI ROM on your device, you need to first unlock your device bootloader. While unlocking a device bootloader may seem like a complicated task, it is actually the easiest thing to do on an Android device. If you do not have an unlocked bootloader already, follow the simple guide below to get it done.
Warning: Unlocking your device bootloader will completely erase your device, so make sure to backup all your important files and data before proceeding.
How To Unlock Bootloader On MediaTek Devices.
- Setup adb and fastboot on your PC.
- Go to your device phone setting and enable USB debugging and OEM unlocking. Both option can be found under the device developer options.
- If you can not find the developer options in your device setting, go to about phone in your settings app and find your device build number, once found, tap on it seven time to activate the developer option in the settings panel.
- Connect your device to the PC via a USB cable.
- Launch command prompt windows on your PC.
- Boot your device into the bootloader mode using the command
adb reboot bootloader. - In bootloader mode, issue the following command to unlock your
fastboot oem unlock(works mostly on old devices). If that does not work, then use the commandfastboot flashing unlock. - Now, check your phones screen to see if you have any bootloader unlock comfirmation prompt to allow the operation to continue. If yes, press the Volume Up key to accept and the unlock would be done in matter of seconds.
- Once the bootloader unlock process is complete, enter the command
fastboot rebootto reboot your device. - During the reboot, your device will perform a factory reset and once done it will boot into the system (OS).
That’s it, you have just unlocked the bootloader of your device successfully and are almost ready to install a GSI ROM. Before we get to the steps in flashing a GSI ROM on any project treble compatible device, there is one more thing we need to do and that is to determine our device architecture in other to download the correct GSI ROM for our device.
If you’re a Xiaomi user, follow our previous guide on How To Unlock Bootloader On All Xiaomi MediaTek Phones Instantly to unlock your bootloader without having to deal with the the 7 Days (168 hours) Waiting Time.
Similar to how custom ROMs for a device cannot be flashed on another device, GSIs are also built for different device architectures. What this means is that a GSI for a 64bit a/b device can not work for a 64bit a-only device. What makes it different from the nature of custom ROMs like I have mentioned earlier is that customs ROMs can only be installed for one particular type of device whereas all Android devices with the same architecture can use the same GSI regardless of the OEM.
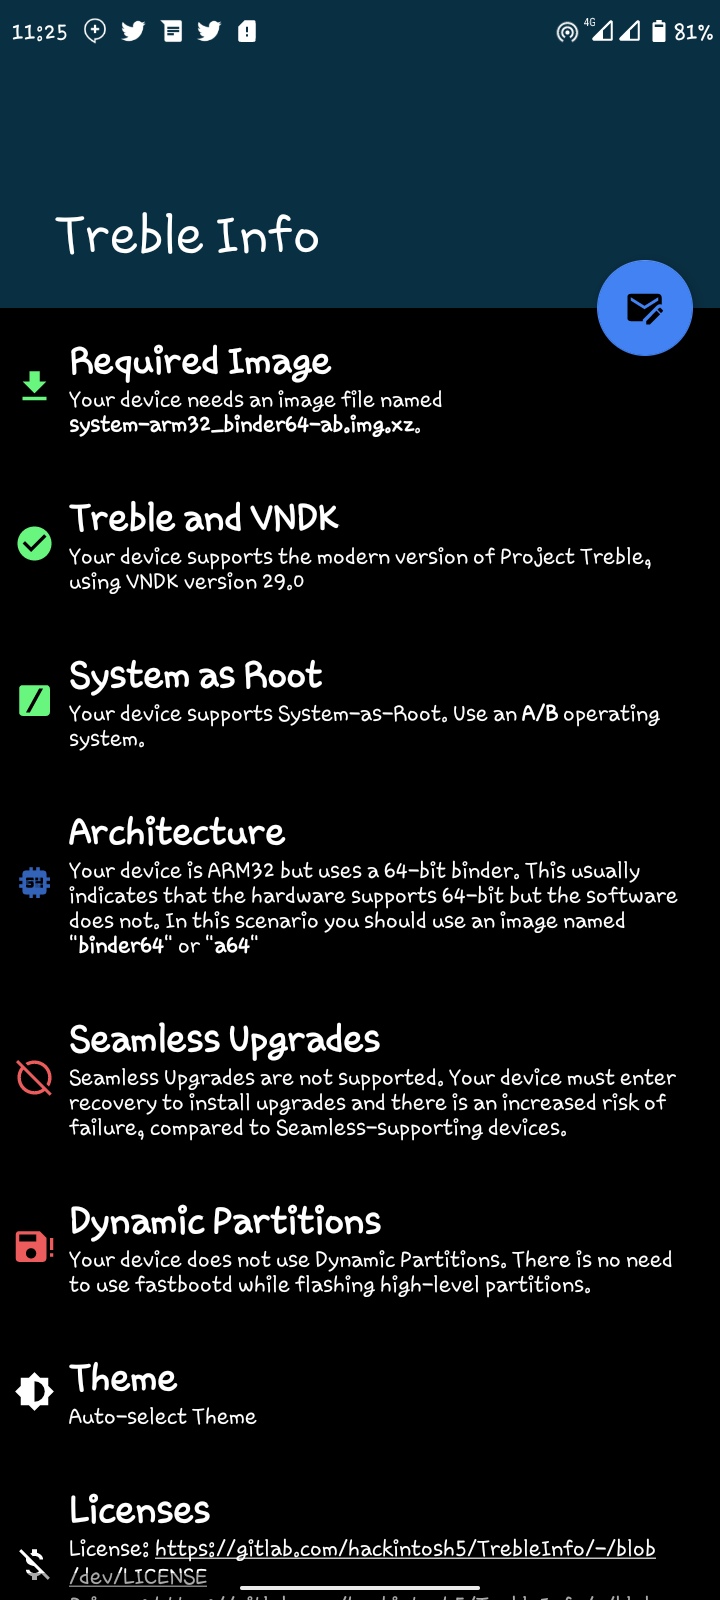
If you’re new to the Android modding community (aka custom roms) and do not know how to check for your device architecture type, you can easily get this information using the treble info checker app for Android. Once you have installed the treble info app on your device, your architecture and the GSI best suitable for your device will be displayed as shown in the screenshot below.
As seen on the screenshot, any GSI that has the name binder64/binder64-ab or a64/a64-ab attached to it can be installed on the Tecno Spark 4 KC8 device.
Now that you have a device with an unlocked bootloader and have been able to identify your device architecture and the type of GSI you are supposed to flash on your device, head over to Phhusson’s (phh) GitHub GSI list page to download a GSI ROM for your device and let’s take a look at the steps in flashing a GSI ROM on any project treble enabled device using the two methods that we mentioned earlier.
How To Install GSI ROMs With TWRP
Installing a GSI via a custom recovery is simple and straightforward. Whether you are using TWRP, PBRP, SHRP or Orangefox recovery, the installation is the same, however, the recovery interface and features are different. I am using PBRP (Pitch Black Recovery Project) for this guide.
Steps To Install GSI ROMs With TWRP
- Download any GSI of your choice from the Phh link mentioned above.
- Copy the GSI to the root of your folder where it can easily be located.
- Reboot your device into recovery mode.
- In recovery mode, take a full backup of your stock rom to an external storage (recommended).
- After that, go to the wipe section and perform a factory reset.
- After the reset, to back to the recoveries main menu and tap on the install button.
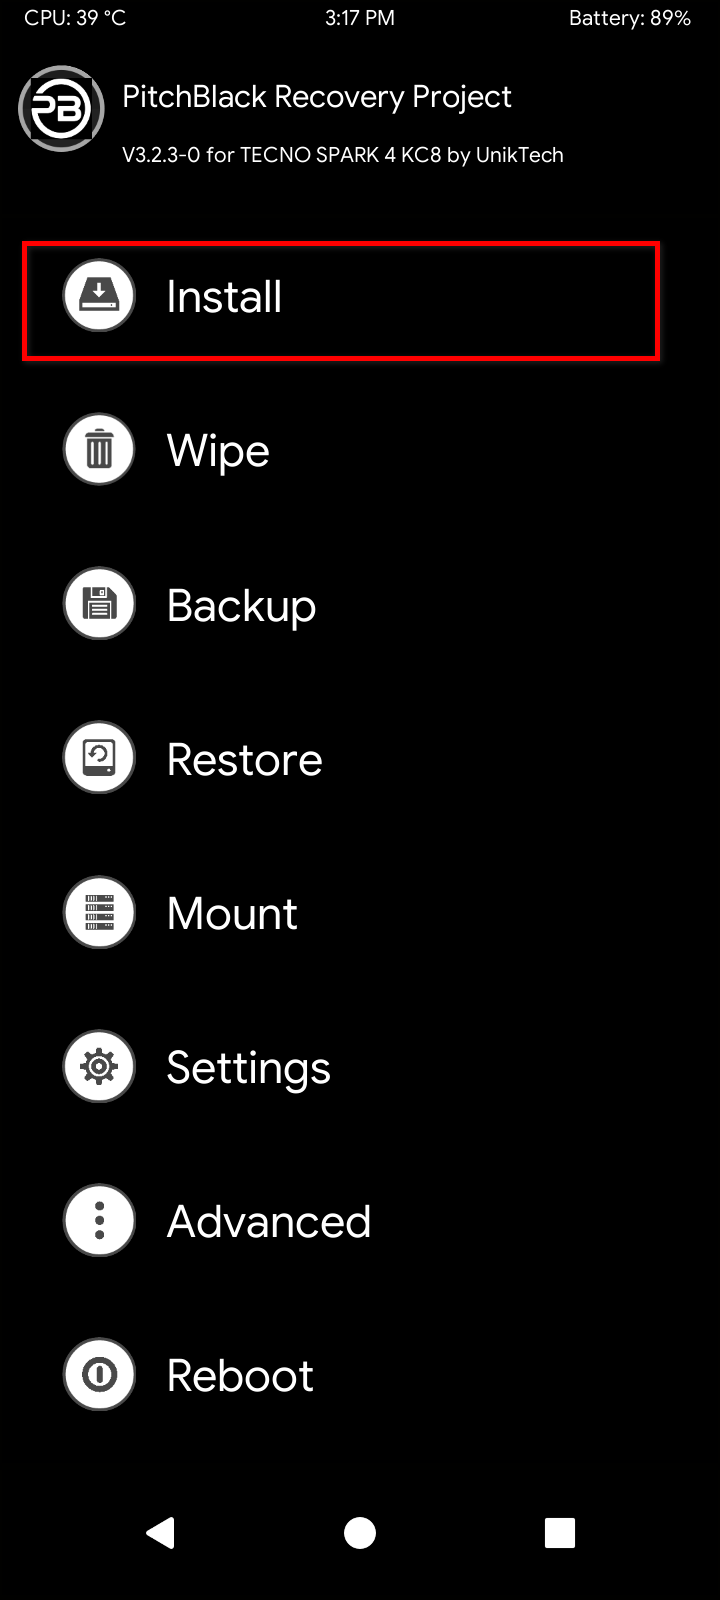
- On the next windows, tap on the install image option.
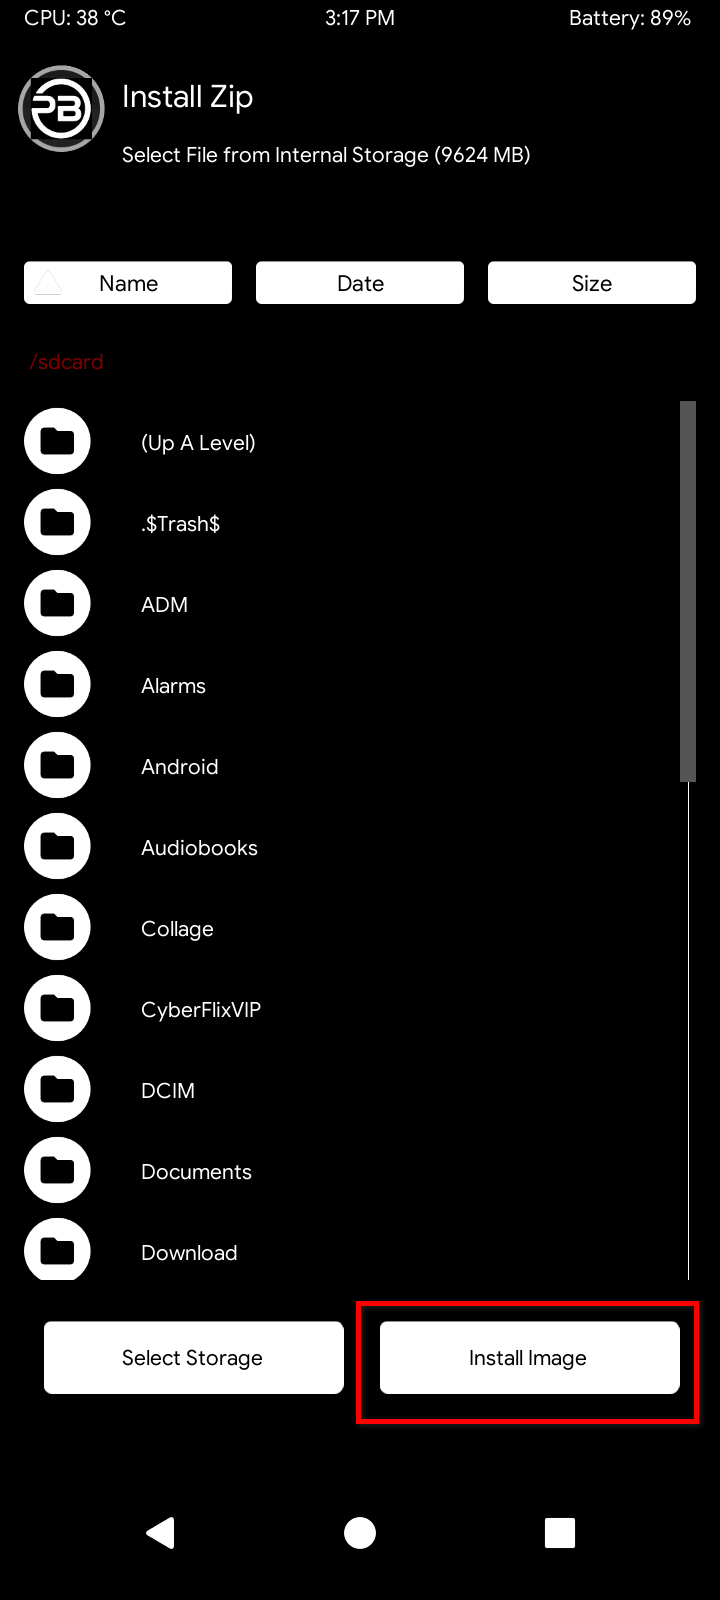
- Select the GSI file (OS) you want to install on your device.
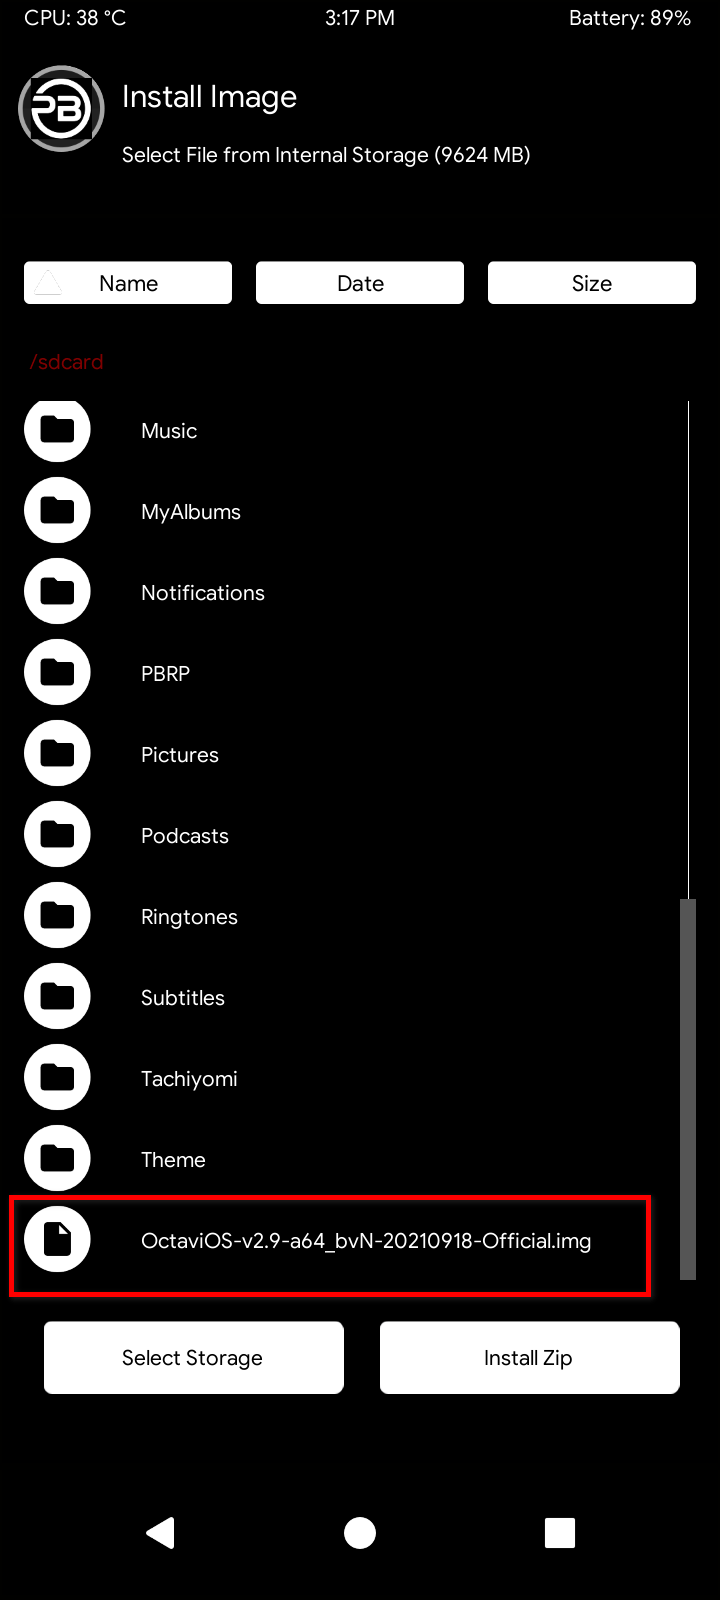
- Choose the partition you want to flash, in this case, the system partition.
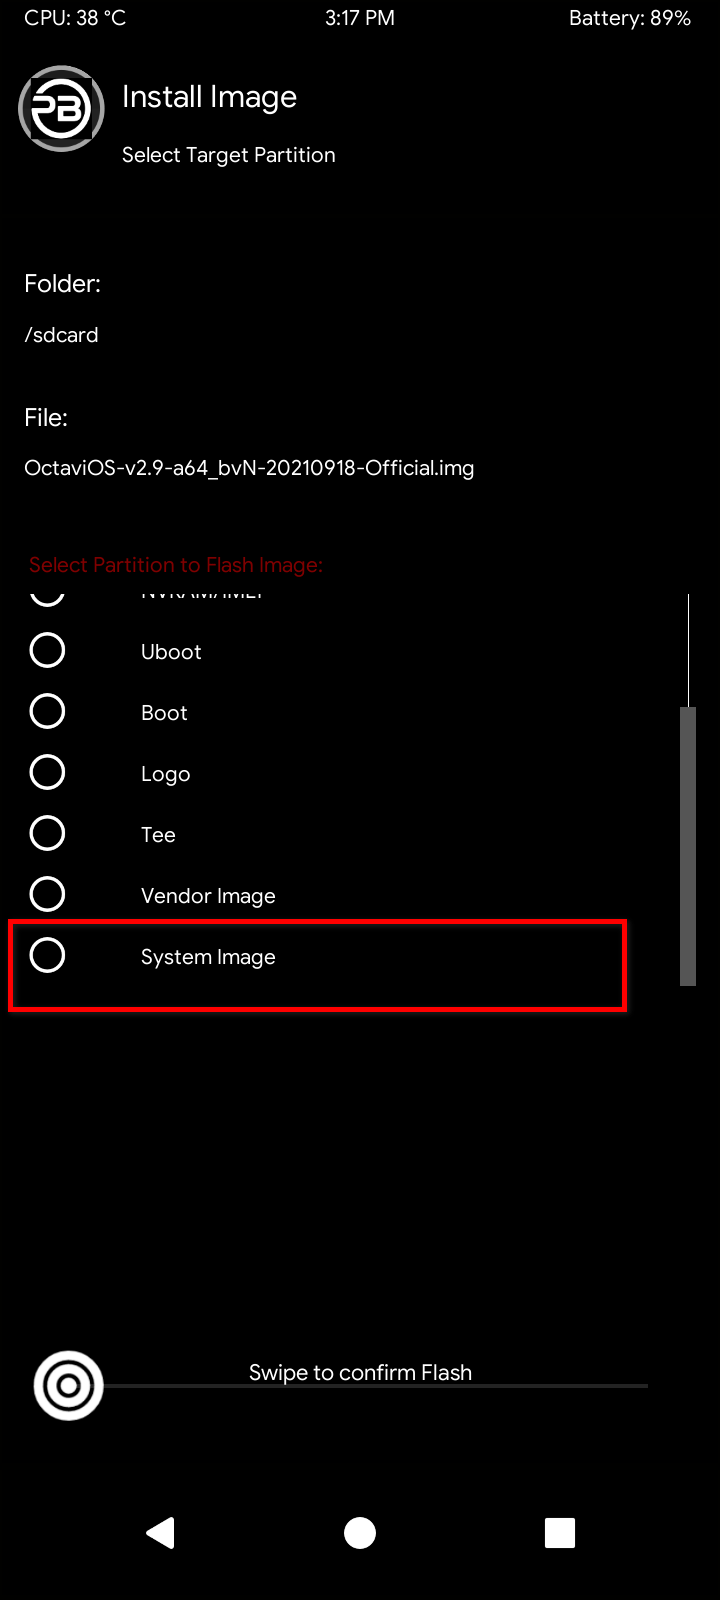
- Now, swipe to flash the GSI image and wait for the process to complete
- Once the installation is complete, you can flash gapps if your want to or use the rom without gapps – your choice.
- Now, reboot system.
Your device should now boot into the newly installed OS. If you encounter any problem after installing the GSI ROM, simply reboot back into recovery mode and restore the stock from backup you made before installing the GSI.
Read also: How To Fix Root Not Working After Flashing Magisk Patched Boot.img
Also, if you want a custom recovery for your device but you can not find any online, you can try porting one for yourself using the guide in the video below. The guide works for Android 8, 9 and 10 devices.
How To Install GSI ROMs Without TWRP
If you don’t have a custom recovery like TWRP on your device yet, you can flash GSIs via adb and fastboot using the steps below:
Steps To Install GSI ROMs Without TWRP
- Make sure adb and fastboot is properlly instlled on your PC.
- Download any GSI you want to install on your device from the phh link above.
- The nest step is to download empty vbmeta.img file becuase we will be needing the file to disable verified boot as we go on.
- Perform a factory resest on your device (very important).
- Connect your device to the PC using a USB cable and make sure usb-debugging is enabled on your device.
- Copy the GSI and empty vbmeta.img file you have downloaded to the adb and fastboot folder on your PC.
- Now, run the adb and fastboot comand prompt and enter the following commands one after the other.
- Check if your device is properly connected to your PC using the command
adb devices.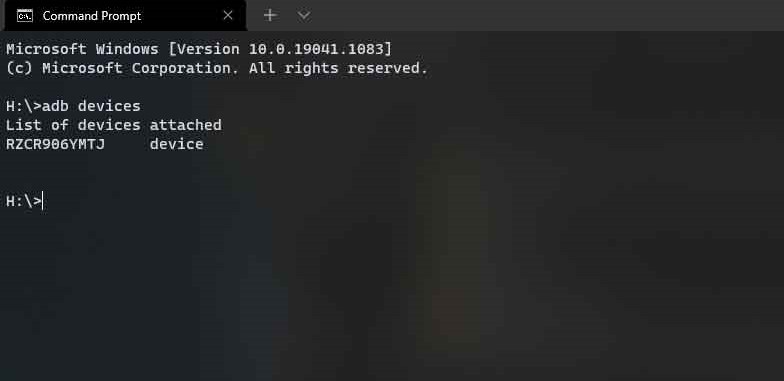
- If your device is properly connected, it will be listed on the command line interface.
- Reboot your device into bootloader mode using
adb reboot bootloader. - In bootloader mode, flash the empty vbmeta.img file first to make sure you don’t run into bootloops or any other booting related problems. The command for flashing is
fastboot –disable-verification flash vbmeta vbmeta.img. - Flash this GSI using the command
fastboot -w flash system image_name.img. - You are to replace the image_name.img with the name of the GSI you downloaded. Let’s say the GSI you downloaded is named OctaviOS-v2.9-a64_bvN-20210918-Official.img, you command will look like this —
fastboot -w flash system OctaviOS-v2.9-a64_bvN-20210918-Official.img. - The flashing process will begin and be completed in about 20 minutes or less. So, be patient and let the installation complete.
- After a successful installation, reboot your device with
fastboot reboot.
If everything goes well, your device will now boot into the newly installed OS. That’s it, you have successfully installed a GSI ROM on your project treble device using adb an fastboot. However, if after installing the GSI, your device still en up bootlooping, you will have to flash your device stock system.img via adb or the complete firmware to get it working correctly again. You can then try another GSI to get one that works well on your device.


