In this comprehensive guide, we’ll show you how to partition a hard drive without losing your data step by step. There are a number of reasons why you may want to create a new partition on your hard drive. When you buy a PC, most times you will find two partitions on your hard drive. The first partition is the local disk (C:) or the C: drive which is your primary storage and then you will find a recovery partition which can have any letter assigned to it (let’s say local disk (D:)) and takes very little space.
The C: drive (primary drive) houses the operating system while also serving as a storage medium for all your files and data. Having a separate partition on your hard drive helps keep things tidy on your primary drive and more importantly prevents data loss when a failure occurs on the primary drive or there is a virus attack.
What Is A Partition On A Hard Drive?
A partition Is simply a segment (space) on a hard drive that has been separated from other segments on the hard drive for a purpose. It’s like a building where the entire structure is the hard drive and you have other rooms as segments with each serving a different purpose.
What Is Partitioning?
This is the process of dividing a hard drive into different segments. You can have as many partitions on a hard drive as you want depending on what you need them for. It could be for backup purposes or if you’re planning to install multiple OS on your hard drive, then, you’ll need to create separate partitions for each OS to do this.
Read also: How To Speed Up A Low-end Windows 10 Laptop/PC For Gaming
Reasons For Partitioning A Hard Drive
You may have a different reason why you want to create a new partition on your hard drive, however, below are the most common reasons for partitioning a hard drive.
1. Better Organize Your Data
Having multiple partitions on a hard drive helps keeps things organized. With the local disk (C:) as the primary partition for the OS, you can have a separate partition to store your personal data, store business data or for backing up program data e.g games.
2. Security
Data security is important to everyone and encrypting data has been of the best ways to protect data from being accessed by a third party. While you can apply encryption to a whole drive, you can have a separate partition that holds your confidential data and encrypt that partition. This makes it much easier to access files on your PC and not have to enter a password or pin each time you need to access a file on your PC.
3. Prevent Data Loss
There are a number of ways that file loss or data corruption on your hard drive may occur. It may be due to a virus attack, hardware failure, or software malfunction (e.g BSOD). Having a separate partition on your hard disk can prevent this because most time, the C: drive is affected first when any of these happens.
4. Run Multiple Operating Systems
If you plan on running a different operating system alongside Windows or any other OS you have as your primary OS, then, partitioning your hard drive is the first step to take. Partitioning makes dual-booting multiple OSes on a hard drive possible and easy. You can have Windows OS running as your primary OS and have Linux OS on another partition and ChromeOS or Android OS on another.
Read also: How To Download Windows 10/11 ISO File Legally?
Without further ado, let’s jump into the detailed guide on how to create a new partition in Windows OS without losing your data.
How To Create A New Partition In Windows 10/11
When creating a new partition on your hard drive, you will need to cut the new partition out of an existing partition which is your primary partition. This is where a lot of people get scared in fear of losing their data or corrupting the OS already running on the hard drive and that’s understandable. Well, I’m glad to tell you that the process of partitioning a hard drive that we’re about to share with you is 100% safe and easy to follow.
For the guide, we’ll be using the built-in Microsoft Windows utility tool called Disk Management to create and modify partitions on your PC. This tool is completely free and easy to use. Also, we’ll be demonstrating the creation of a new partition on a hard drive using the Windows 10 OS. The process is the same for all other Windows OS versions, so, you don’t have to worry.
Steps to partition a hard drive on Windows 10/11
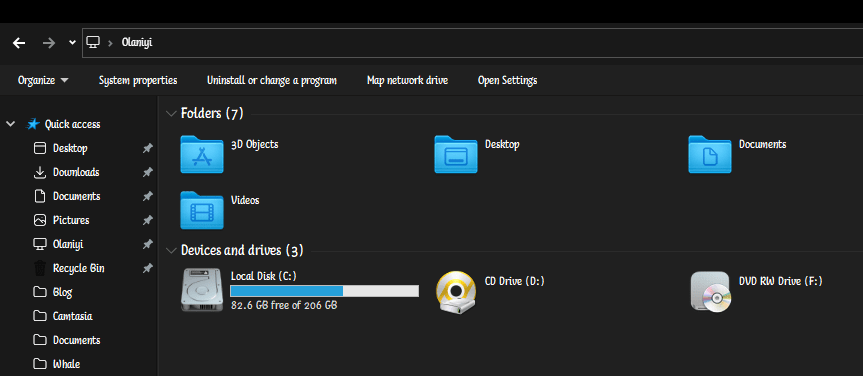
Step 1. Press the Windows key + R on your keyboard to open the run utility tool.
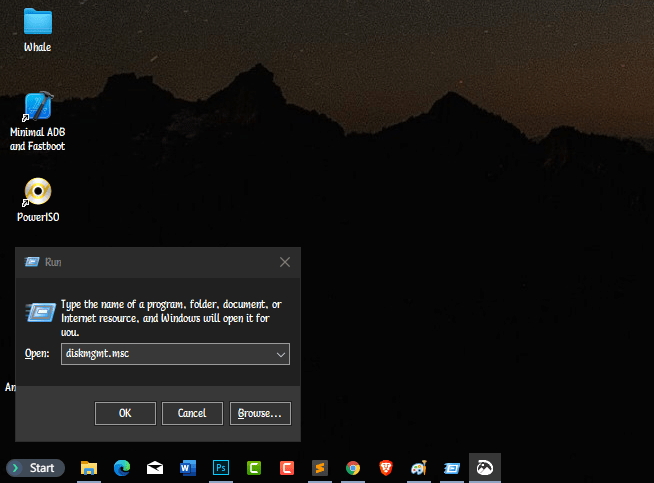
Step 2. In the run utility search bar, type “diskmgmt.msc” and press “OK.”
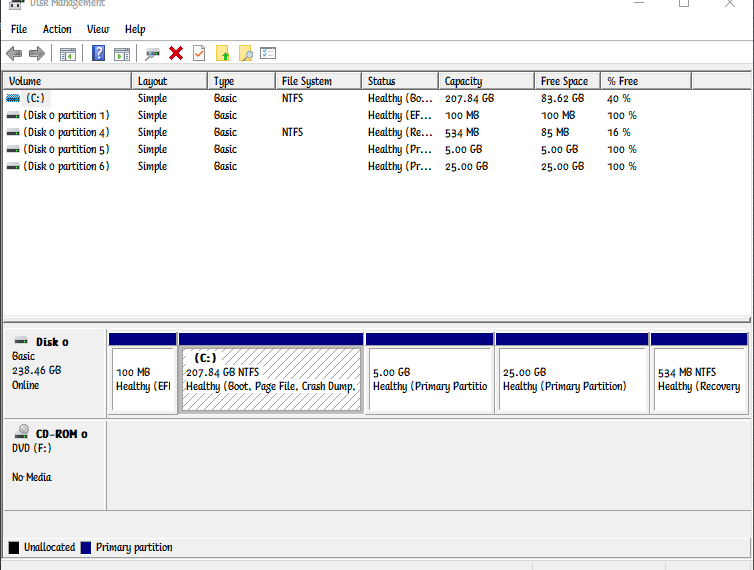
Step 3. A new Window (disk management Window) will appear listing all the available partitions on your hard drive.
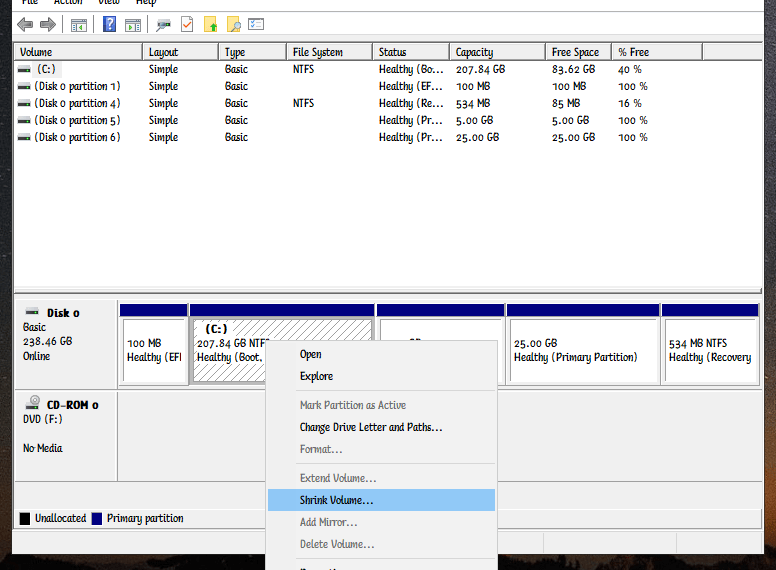
Step 4. Now, right-click on the C: drive or any other drive you want to create a new partition from. Upon right-clicking, you’ll see a small context menu popup with a few options, click on shrink volume.
Step 5. You’ll be presented with another smaller sized window where you have to specify the amount of space you want to allocate for the new drive. On the new Windows, you’ll see the total size of your hard drive in MB and the available space on the drive that you can shrink. To make it easier for you — multiply the number of gigs that you want by 1024 to get an exact gigabyte size and click shrink. e.g For 15GB, say 15 x 1024 = 15360.
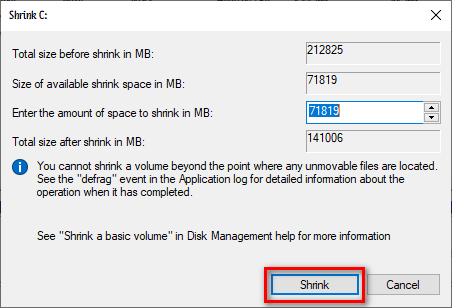
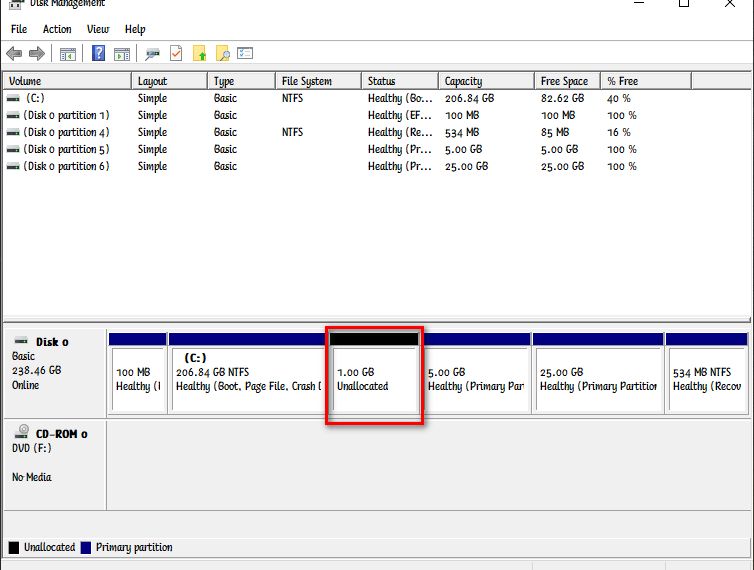
Step 6. A new unallocated drive will now be created on your hard drive. As you can see in the screenshot below, I have created a new 1GB partition. We, now need to set up the new drive for use.
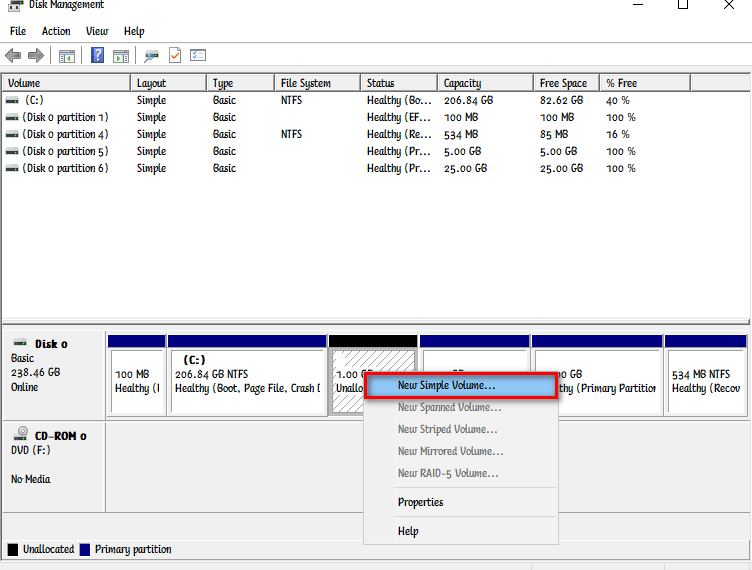
Step 7. Right-click on the unallocated partition you just created. You’ll get a context menu pop up with an option to create a new volume, click on “new simple volume“.
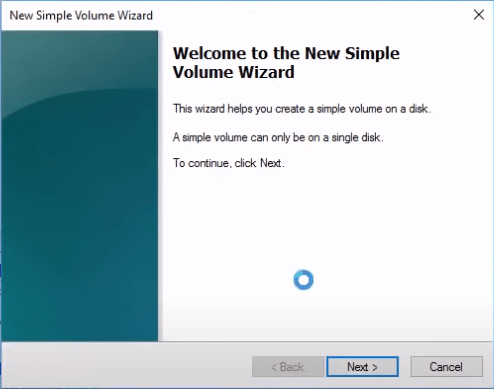
Step 8. Once you click on the new simple volume, a New Simple volume wizard will appear. Click on next.
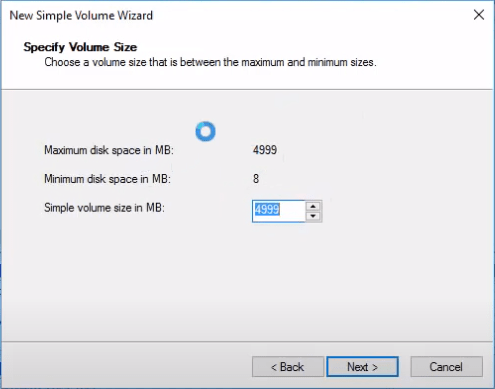
Step 9. On the next screen, you don’t need to change anything just click next. However, If you were planning on creating another partition from the new one, you can split the partition from this window.
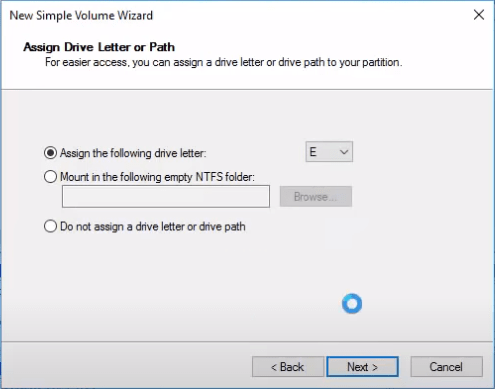
Step 10. Here, you can assign a drive letter to the newly created partition. If you choose not to assign a letter to the partition, the partition will be created but will not be visible in your file explorer.
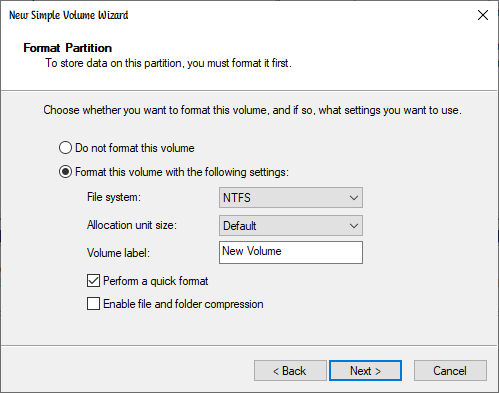
Step 11. You’ll get to a point where it will ask you to set the following parameters shown in the screenshot below. Set it according to the purpose you are creating the new partition. You can also assign a name to the new partition here.
Step 12. After following the new simple volume wizard through, Windows will now format the new partition for first use. Once this process is complete, you’ll now have a new partition to use for your task.
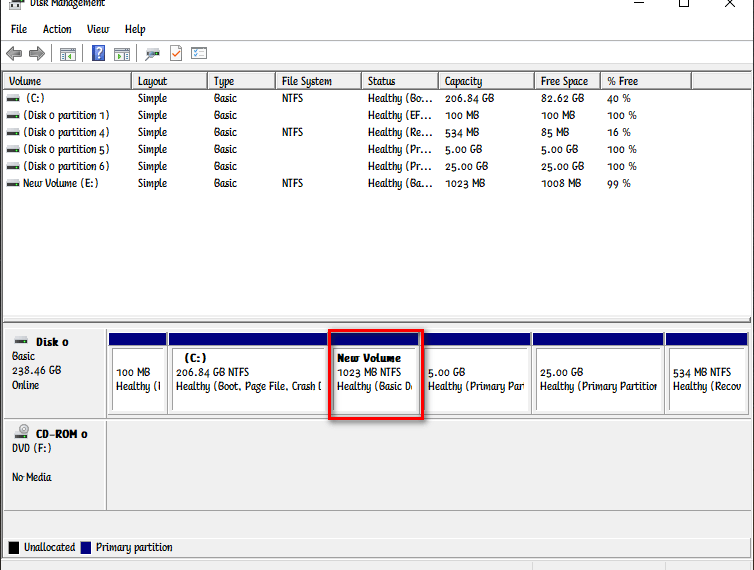
That’s it. You have successfully created a new partition on your hard disk. You can now close the disk management utility tool and view the new partition in your Windows file explorer.
You may also like: How to extend a hard disk drive’s life span
How To Partition A Hard Drive FAQS
Can you partition a hard drive without losing data?
Yes, you can partition a hard drive without losing the data on it. Simply follow the step by step above to create a partition on your hard disk.
Can I partition a hard drive with data on it?
Yes, you can partition a hard drive with data on it, however, you need to have some free space on the hard drive in order to create a new partition.
Can you partition a hard drive with two different formats?
Yes, you can partition a hard drive with each partition having a different file system. Depending on what you’re trying to achieve, you can have an NTFS partition, a FAT32 partition, an exFAT partition etc.
How to create a partition on an external hard drive?
You can create a partition on an external hard drive using the Windows disk management tool following the guidelines detailed above. The process is the same.
Can I create a partition without formatting?
Yes, you can create a partition in Windows 10 or any other Windows OS version without formatting the entire hard disk. Simply follow the guidelines we have explained on this page.
If you find this guide on how to create a new partition in Windows helpful, kindly use any of the share buttons below. Also, if you encounter a problem during this process, tell us in the comment section below and we’ll get back to you ASAP!.

You are the boss (h)
Thanks for dropping By Sir