Hey guys, in this guide you’ll learn how to take a screenshot on a pc using simple methods.
A while ago I was paying for a service over the internet. I used a virtual card in processing the payments and the company required a transaction statement and some other screenshots of the webpage to verify the payments. This was when I realized the importance of a common feature in computers.
Read also: 5 Tips For Beginners To Succeed In MMO Games
If you don’t know easy ways to take a screenshot on your PC, you will most likely be forced to handle business over the phone which might not be so convenient all the time.
Now in this tutorial, we will talk about 4 ways of doing a screen capture easily while you choose your most preferred method.
How To Take A Screenshot On A PC
Taking a screenshot on a PC is as easy as taking a screenshot on a phone, however, so many of us have no idea how to go about with this. The problem is, most of the time we have the tools we need to carry out this simple tasks on our PCs and we see them every day, but because we have no idea what it means or does we are completely left in the dark.
Without further ado, let’s see the simple methods on how to take a screenshot on a PC below.
Method 1: Using Print Screen
When you look on your keyboard whether laptop or PC you’ll find a key labelled as Prtsc or Print Screen on some keyboards. With this key, you can capture the screen of your PC. This is the original method and it doesn’t require any computer program or anything asides;
- A keyboard shortcut and
- Paint
Here’s how it works
STEP 1: Locate ‘PrtSc’ on your keyboard
Bring up whatever it is you want to capture on your screen and press the “Print Screen” (often shortened to “PrtSc”) key. It’s typically located in the upper-right corner of your keyboard and will take a screengrab of everything on all of your displays. Press “Alt + Print Screen” to capture a screenshot of the active window only. If you’re on a laptop, you may need to press “Fn” + “Print Screen”. “Fn” + “Print Screen” works on my own device.
You can try either the alt or Fn combination until either one responds.
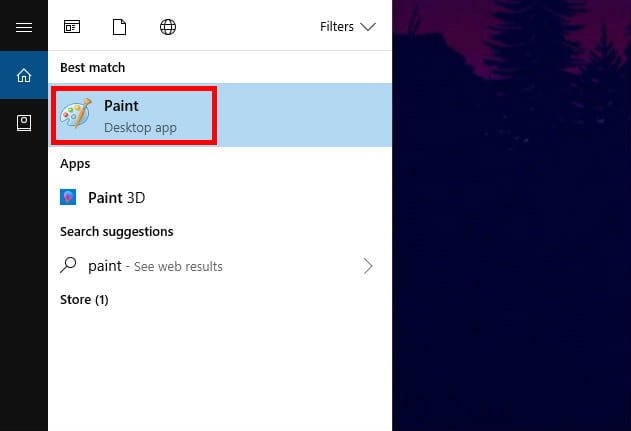
STEP 2: Open Paint
Go into the search bar in your start menu and type “Paint”. Click the corresponding result.
STEP 3: Paste the Screenshot
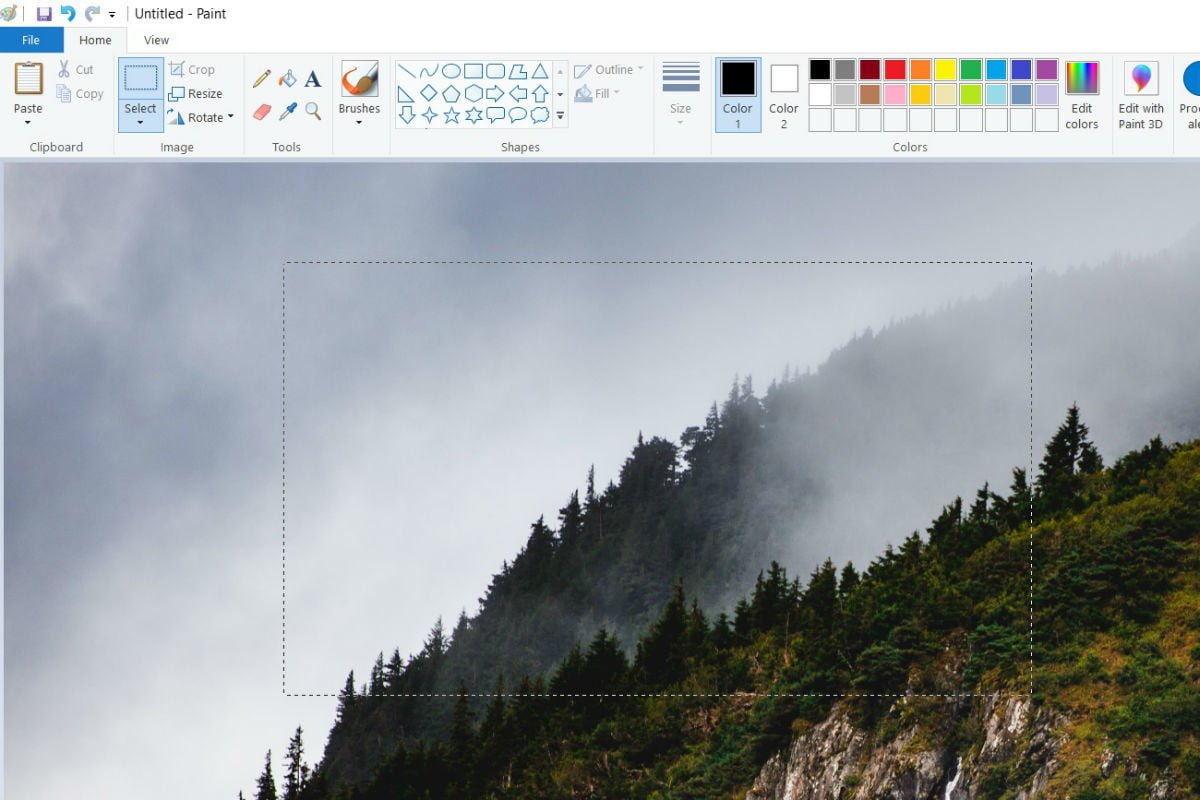
Once Paint is open, click the “Paste” button in the upper-left corner of the program, right click on the empty field and press paste or press “Ctrl” + “V” on the keyboard to paste your screenshot.
You should see the image you captured, appear in your edit windows in Paint.
Read also: TOP 5 SOFTWARE EVERY PC USER SHOULD HAVE
From there, perform any edits you want, including cropping or selecting a certain part of it (optional).
STEP 4: Save The Screenshot
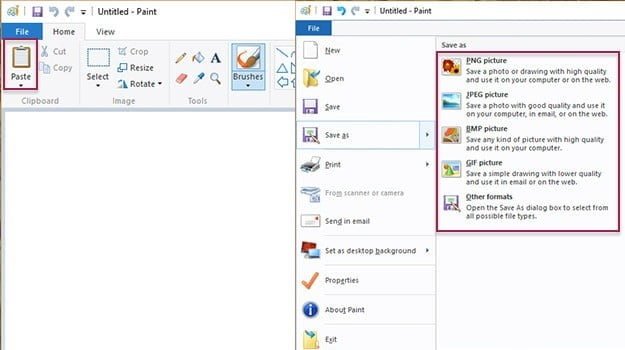
Click the main “File” option in the upper-left corner, followed by “Save as.”
Title the new file, choose a save location, and select your desired file format from the drop-down menu. For most purposes, JPG will do fine, but a variety of other formats are available to choose from such as PNG, BMP, GIF and others.
Click the grey “Save” button in the bottom-right corner when finished.
And that’s it! You’re done.
Method 2: Using The Snipping tool
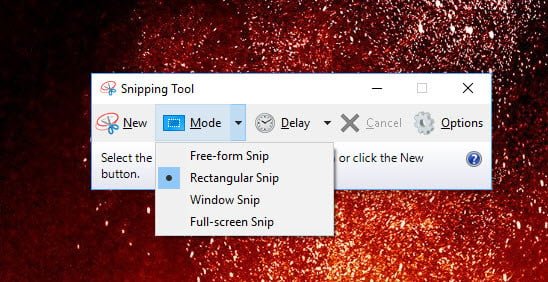
This is the easiest, most convenient method to do a screen grab on PC if you ask me. It even gets better with Windows update. The Snip tool is a system program that is pre-installed on your PC.
To use the snipe tool, just use the search box ‘Snip tool‘ in the start menu. Open the corresponding result and open Snip tool.
From there, it’ll give you options such as drawing a “Free-form Snip,” a “Rectangular Snip,” a “Windows Snip” and a “Full-screen snip”
» Free-form: This mode lets you cut any portion of your PC’s screen by drawing out the portion you want to make an image.
» Rectangular mode: It allows you to crop the portion of your PC screen. This mode is better compared to the first free-free mode where you have to draw out certain portions which will not be cut straight and smooth like the Rectangular mode.
» Windows snip: This captures your full screen leaving your taskbar out of the picture. You don’t need to draw or move your cursor to capture screen with this mode. Once the mode is selected it captures your screen immediately and you can proceed to save it.
» Full-screen mode: This mode works similar to the Windows snip mode, the only difference is this mode captures your entire screen including the taskbar.
This tool comes with additional editing option when you capture your screen. You can highlight certain areas in the screenshot you have taken and with its highlight option, you can also write manually on the screenshot by moving your cursor and their’s an eraser option too just in case you make a mistake while editing the screenshot with the snip tool editor.
Read also: HOW TO USE AN ANDROID SMARTPHONE/TAB AS SECOND MONITOR FOR PC/MAC
You can also send your screenshot to a friend or colleague via email from the Snipping tool editor.
If you’re running the latest Windows 10, Snipping tool comes with Microsoft 3D paint linking. With this, you can edit the screenshot even more.
Method 3: Using PC Screen Capture (third party App)
This looks similar to the Snip tool except it is not a Microsoft developed program. It was developed by a third party company but does the job quite well.
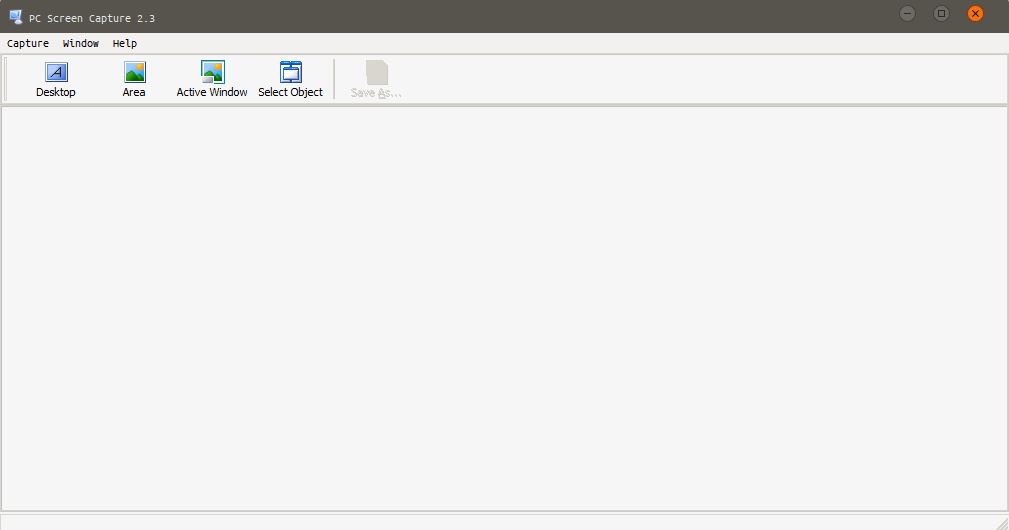
PC Screen Capture has a lot of options the Snip tool doesn’t and that’s the advantage.
This tool comes with for main option for capturing your PC screen. They are;
» Desktop: This option captures your entire screen with no option to resize or crop out a portion of the captured screen.
» Area: This lets you crop the portion of the screen which you need instead of the whole screen.
» Active Window: The active window is also similar to the desktop option, it basically captures the entire screen of your active Windows.
» Select Object: This option lets you select a particular portion or object (icon, file, folder) on your screen instead of capturing the entire screen.
This tool is very easy to use and fast. However, it doesn’t offer editing option like Windows Snipping tool.
One of the things I like about this tool is that you can take multiple screenshots at once and display them in either Cascade view, Tile Horizontally or Tile vertically and save one after the other instead of doing it individually.
Read also: How To Download Any Windows OS [Official ISO File]
Pc screen capture supports different image formats like .png,.jpg,.gif,.jpeg etc and it’s completely free to download and use.
Download PC Screen Capture (no need for installation).
Method 4: Using FastStone Capture (Third party tool)
FastStone Capture is a powerful screen capture tool unlike the previous we’ve discussed. This tool houses all the features of the first three tool we’ve mentioned and offers even more editing options like draw, caption, spotlight, blur, print and lots more.
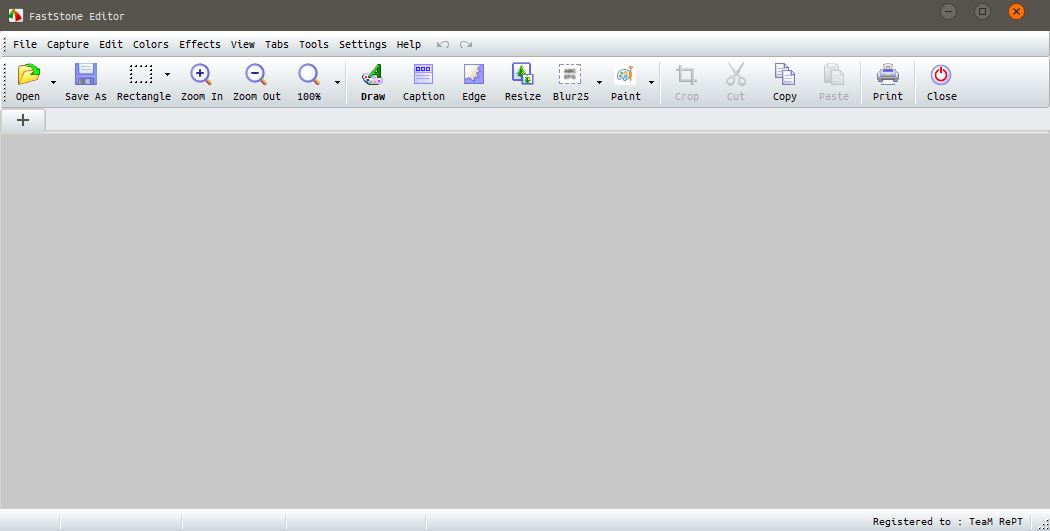
It also comes with an inbuilt screen recorder option which also works with your microphone. It allows you to easily capture and annotate anything on the screen including windows, objects, menus, full screen, rectangular/ freehand/fixed regions as well as scrolling windows/web pages.
You can choose to send captures to editor, file, clipboard, printer, email, Word / PowerPoint document or upload them to your website.
Some of the editing tools include: Annotating (texts, arrowed lines, highlights), resizing, cropping, sharpening, watermarking, applying edge effects and many more. Other features include image scanning, global hotkeys, automatic filename generation, support for external editors, a colour picker, a screen magnifier, a screen crosshair and a screen ruler.
FastStone Capture saves images in BMP, GIF, JPEG, PCX, PNG, TGA, TIFF and PDF formats. Built-in screen recorder saves videos in WMV (Windows Media Video) format.
FastStone Capture is available in two versions, free and paid. The free version gives you the basic tools you need to take and manage screenshot while the paid version unlocks all feature of the app. The paid version cost $19.95 and its one payment for a lifetime use.
That’s it, now you’ve learnt how to take a screenshot on a PC using free tools. Don’t forget to like and share and if you know of any other great free tool, do share with us in the comment.

